Light vs Heavy Engineering
This is the start of a short series on Light vs Heavy Engineering, when one should be applied over the other, the processes used in each, and how to get projects with long iteration loops to adopt shorter ones.
Part 1: Light vs Heavy Engineering
As engineers, we're trained to build things that don't break.
Plans for a bridge signed off on by a certified Professional Engineer after years of work. Rockets are simulated over and over in every environment and scenario imagined by its designers.
Colleges teach engineers to design to specifications; a definition that dictates where the project can fail and by how much. "This bridge must have one hundred cars drive on it daily for twenty years before it fails." "Computer RAM must withstand ten million erase cycles before it has corruption errors." It's beaten into us during school to build things that last. We're taught to do Heavy Engineering.
Heavy engineering is the attempt to predict and simulate the real world during your design loops. Specifically the test portion is done in a replicated or simulated environment instead of the true environment in which the product will be used.
We need heavy engineering for the big projects. The military ships, rockets, car air bags, airplane turbines, buildings, and many embedded software projects where the human or monetary cost is too high to test in the real world environment for the product.
Though more and more we're starting to see "light engineering" used for large projects. What's the difference? The time to complete a loop - otherwise known as an iteration and decision/ OODA loop - for heavy engineering is 6 months or more. For light engineering it's short. Sometimes hours, minutes, or seconds for automated systems.
A loop is one design, build, test, ship cycle. To complete a full cycle a project much ship to real customers. In an ideal case the project ships to as many people as possible.
If a team can get its loop timing quick enough they can and should engage in light engineering. The main goal of light engineering is to get to the "Oh my god there's not a market here" or "we didn't plan for variable to make such a large impact" realization as fast and with as little waste as possible. Being incorrect about a fundamental assumption of a company or project is not something tolerated by heavy engineering. There is not the time to be wrong because of how long and the cost it takes to go through a second iteration loop.
You might be thinking, "This sounds like Lean Startup/design/business/etc!" This and the lean methodology have their roots in the same place (see John Boyd). However, Lean is prescriptive in how you go about getting your loops short. Light engineering is not. It is a purview for looking at and approaching a particular set of problems.
The faster the loop the better; ship to customers in the real world often. Software developed for the web, most mobile devices, and handmade or basic plastic physical goods are common examples of light engineering. Software is often shipped to customers hourly (or faster) providing almost instant feedback. Hardware is pushing towards shorter loops through additive manufacturing and creative development processes.
One approach is not better than the other. Rather they are two different ways of executing against a problem. If the loops can be quick it's better to test in the real world. If they can't, you'd better simulate the real world to make sure it's right the first time.
The Prepared Podcast
I was on The Prepared podcast this week chatting with Spencer and Zach about the order & fulfillment management system I'm building for their relaunch of The Public Radio.
Med tracking and Reminders: How to Avert Human Error
There’s been some illness in my family lately. The kind that requires lots of doctor visits and medication. As with any major illnesses, half of the anxiety for both patients and care givers comes from remembering what medication to take when. So how do you avert human error? You systematize the medication and care cycle.
I’ll walk through the steps to set up everything to a medication dashboard and reminder system.
What I set up strings together:
- Google Spreadsheet/Sheets API for input and a dashboard
- AWS Lambda for checking the next timing of every medication every 15 minutes
- AWS SNS for notifying the care givers when a medication can be given
Disclaimer:
This system is customized and pretty “dumb”. There are many hard coded things that could be made generic. I'm planning further work as needed but not on going.
If you want to browse the files and sheets, head over to Github or Google Sheets. I’ll continue with a tutorial below the links.
If you’ve never heard of AWS Lambda or SNS check out the links below:
Tutorial
Google Sheets
First thing is the Google Sheet. This is set up for very easy input for the care givers and to show the available timing for each medication. You can use just this and it will make a huge difference by giving the care givers a simple place to enter medication disbursement and to see what times the meds can be given next.
Click here to access the sheet. Duplicate and clone it so you can use it for yourself. This setting is in the File menu in Google Sheets.
Follow the instructions on each sheet. Fill in the medications and the dashboard / dropdown menus will take care of themselves. The Active column is used to select which medications are currently being given. These are the ones you’ll get notified for in the next section.
Once that’s done all you have to do is select a medication from the dropdown menu, enter the time it was given, and the number of pills / capsules that were given. Based on the time given and the interval for the medication, the dashboard will update with the time for the next dose.
AWS SNS
You’ll need an AWS account for this next portion. Luckily they’re easy to create and the services you’ll be using are cheap. It cost me $10/month to run and that’s with a lot of notifications everyday. Make an account and then head over to Amazon SNS(Simple Notification Service) in the AWS management console.
Once there, create a new topic.
Then create a SMS subscription to that topic. Enter in the phone number you want to get notifications on in the format +1 312 867 5309. Repeat this step for each phone you want to get the notifications to.
The topic is what we’ll be sending data about the medications to. That topic will then forward it on to any subscriptions (phone numbers) you have added.
Make note of the topic ARN. We’ll need this in a bit.
AWS Lambda
Next we’ll configure the AWS Lambda function that pulls the medication from the Google Sheet and sends it over to AWS SNS to text you if it’s within an hour of the next dose for a medication.
Click into the AWS Lambda management console.
Click Create a Lambda Function.
On the Select Blueprint page, click Skip at the bottom.
Add a CloudWatch Events - Schedule trigger. Enter a rule name, and the rate (schedule) of how often you want the function to check the medication timings. I chose every 30 minutes.
On the next page, name your function and select Python 2.7 as the runtime. Under Code entry type select Upload a Zip file.
Clone the github folder for the google_sheets_to_sns lambda function. Follow the instructions in the Readme to get Google credentials and modify the code. Once you’ve created the ZIP file, upload it as the function package.
Enter google_sheets_to_sns.lambda_handler for the Handler.
For Role, select Create a custom role. You’ll be taken to AWS IAM to create a role that allows your code to access the SNS topic you created earlier. Click View Policy Document and then Edit. Paste in the the sample role below replacing arn:aws:sns:us-west-2:<account_number>:notify-family-members with your AWS SNS Topic ARN from earlier. Then click Allow to save the new Role.
{
  "Version": "2012-10-17",
  "Statement": [
    {
      "Effect": "Allow",
      "Action": [
        "logs:CreateLogGroup",
        "logs:CreateLogStream",
        "logs:PutLogEvents"
      ],
      "Resource": "arn:aws:logs:*:*:*"
    },
    {
      "Effect": "Allow",
      "Action": [
        "sns:Publish"
      ],
      "Resource": [
        "arn:aws:sns:us-west-2:<account_number>:notify-family-members"
      ]
   }
  ]
}
Leave all other settings. Click next to review the settings for your function. Then click Create function when everything looks good. Click test to watch the function run. If there are errors go ahead and fix them up.
Congrats! Every 30 minutes your function will fire, check the google sheet for medications that are coming up, and send you a text about them! How great is that?
Was this a bit complicated for the average person? Yes. Does it help you keep track of lots of medications you’re managing for someone you love and make sure you don’t miss medication? You bet.
I’ll do another post on getting an Amazon Dash IOT button set up to be a call button so that you don’t have to be physically next to the person you are caring for. Very helpful in making them not feel alone and allowing the caregiver to move about the house without worrying.
Comments and questions welcome as always.
-Gabe
I am a mechanical engineer
3 years ago I was in San Fransisco looking for a job. Well, looking for leads of people to talk to that might have interesting jobs. As a Mechanical Engineer fresh out of school, I wanted to build physical things. Things that people would use. I wanted to hack physical things, take them apart, assemble them into something useful and novel. What I found out west was lots of companies that wanted me to do one specific task for years. This does not suit my personality nor how my brain works. Luckily I found Quirky.
Quirky challenged me in ways I could never have expected and provided the high stress, fast paced, and ever changing workload I had loved so much at Georgia Tech. After 6 months I went to help test products at Wink. It was the perfect melding of interest, new technology, and lots of things I could take apart. Two moths later I was moved to Wink full time in a Systems Engineering role.
Being predominantly a software company, Wink’s product was new for me. I could make physical things and read code but writing code was intimidating. However, I quickly picked up the interactions in software and the functional paths through our product as we tested 50+ different partner products for the Wink platform. It was mentally stimulating, but I still wanted to build physical product.
Quirky went bankrupt the next year and during Wink’s acquisition process I started looking for new jobs that would push me back into the realm of building physical devices. This was a defining moment; the realization that I had stopped building. Building anything; creating something impactful. I had a year of writing specifications and learning how code worked from an external point of view but not building any of it.
After a year as a Systems Engineer, Wink offered me a new position as a Site Readability/DevOps Engineer. Run the server infrastructure. Make it stable and scale. Build tools that make life easier for moving code changes around. Take all the pieces apart, learn how they work, and put them back together again. Sounds like my type of job.
So, for the past 8 months I have been building and coding. Actually coding. Something that was not in the master plan 3 years ago. My moniker in the software realm prior to 8 months was much more along the lines of script kiddie or sys admin than Software Engineer. I have since been indoctrinated in the ways of distributed applications and infrastructure; Docker, Vagrant, and other tools for workload isolation; Kubernetes, Docker Swarm, and ECS for orchestration; Ruby, Python, and Go; 12-factor application development and software engineering theoretics. One thing I couldn’t have predicted is how much coding is an art form. We all have the same paints and can be taught how to mix them into different colors, the way we apply them to the canvas can mimic others, but it’s never without your personal fingerprint.
Physical devices and interactions are amazing but coupling it with the art of software is what makes it magic.
Given the above journey, I am now more than ever an Engineer. Hardware, software, design. I build things. I break things. I apply the theoretics garnered by scientists to the world around us to make magic happen. There are a few on-going projects that will be talked about on my blog in the coming months:
- The website will go through a re-branding to Built by Experiment rather than The Building Experiment.
- A 3D printing company I’m starting with a few others. Think custom prototypes for those who have no prototyping skills.
- A new combat robot I’m designing code named: Gimli
- Bringing Embedded and Windows application development to a continuous integration cycle closer to that of distributed web applications.
- Thoughts from my infrastructure work at Wink and on-going learnings.
Interested in the above? Let’s chat
Here we go.
How to build a city: Hudson Yards
The longer I live in NYC the more I am fascinated by how such a large epicenter of human progress runs on a day to day basis. This encompasses urban logistics like traffic engineering and water management in addition to the need to move millions of people around with very little friction. A large part of this was learned from experience and there is no better place to see that experience be put into action that in a newly constructed buildings. Not only due they have to contend with the (some times poor) decisions of the past but often time do things effortlessly that were thought out of the realm of plausibility very recently.
The NY Infrastructure Observatory, lead by Spencer Wright is a perfect place to see this in action. They are a group who tours large infrastructure projects in and around NYC. On Wednesday this week we ventured into the Hudson Yards development project on the west side of Manhattan. This is the largest commercial project of its kind in US history.
It was an amazing walk through and the southward facing views are like none you get elsewhere in the city.
In search of a use case: Why your smart home isn’t that useful
The current state of the Smart Home can be one of awe but more times than not it’s a frustrating, hole ridden, maddening experience. There’s an expectation problem. One the industry is slowly overcoming but one in which the frustration endured setting up a system is not rewarded with with a proportional compelling performance. Performance not in terms of stability and reliability - which help a ton with perception - but useful experiences that inspire a sense of wonder. If something is utterly amazing but fails 1 out of every 10 times people are more forgiving. If it’s mundane, the reaction is going to be to curse it and most likely trend towards saying, “It’s a shit product.” Which, it probably is.
So why isn’t your smart home useful? Currently there are very limited situations in which connected products make sense to use. And it’s not an execution problem. There are lots of companies and platforms executing to a nice high standard. It’s a lack of compelling use cases, industry maturity, and technical understanding.
Companies, driven by marketing or the hype train that is internet connected devices, want their devices to be connected. They put a chip in it, market the hell out of it, and well, some people buy it. The problem is they missed the use cases. They sped right past them to the finish line. What they did was take a dumb device and connect it to the internet. What they didn’t do was make it useful.
Let’s take an example: a connected refrigerator. What do you actually want an internet connected refrigerator to do?
- Tell you what you can make for dinner with what you have?
- Auto order milk for you when you’re low?
- Keep track of your diet and remind you at 3am that the apple is a better option than the ice cream?
What can it actually do:
- Turn your ice maker on and off
- Adjust the temperature of your fridge and freezer. (Not based on what’s in it, that would be compelling. This is not.)
- A glorified internet browser via an android tablet.
The products themselves are not capable yet. They need to be looked at again. Not in terms of how do we make a connected refrigerator, but how do we make a better refrigerator. This is not a new idea. Not even close. All I’m asking is that these companies take an actual full length product development cycle and build in the needed outputs (read: sensors) and hardware to enable the compelling use cases. This is hard, it’s expensive, it takes time but yields a product that will make people’s eyes light up and not a refrigerator with an android tablet that’s smart.
So what do I mean by smart or useful home products and appliances?
A connected thermostat is great but only when it works around your schedule; a connected dryer is great but only when it runs during low power usage hours; a connected refrigerator is great but only when it gives you suggestions of what to make; connected light bulbs are great but only when they make your environment more comfortable at all times of the day and turn off when you’re not there; pet doors that completely seal except when the pet is in front of it; and the list goes on.
There are companies doing many of these things - Nest, August, Ecobee, Canary - and then there are companies that are struggling. These are the big brands where there is a fundamental lack of understanding around what the technologies that make products smart are used for. For example: a light bulb has two very compelling use cases:
- Being on when you’re in the room and off you're not
- Changing the color temperature to make the environment more comfortable at a specific time of day.
- Rave Mode (cool twice a year, but not that compelling)
The second one is straight forward, the first one is currently being solved by geolocation tracking in you phone which isn’t very reliable but can be greatly increased with in-door presence sensing. For this, you care more that someone is near the bulb and less who. Bluetooth LE Beacons (iBeacons, AltBeacons etc) help tremendously with this. Given 3 bulbs in a room you have a rather precise location. The issue is that while compelling, the people making decisions at larger companies that make light bulbs think that Bluetooth LE Beacons are purely for a retail environment. Since the lightbulbs for the consumer and in home space, why even explore it? This isn’t just ignoring a use case, it’s failing to future proof a light bulb that’s suppose to last 22 years.
The cure is time and hard work to move these products categories where they need to be. So what do we do in the mean time?
Focus.
Focus where the tools are built to make something compelling. The use cases where you have all the inputs you need while pushing towards the ones that make our homes truly smart. Some examples of where to focus?
- Lighting control
- Voice control
- Motion sensors -> lights off/on
- Door sensor -> lights on
- Monitoring and security systems
- Alerts when you're away from home
- Unwanted entry
- HVAC / Climate control
- Instead of using the HVAC, lower blinds and speed up fans until a set temperature.
- Don't heat/cool my house when I'm away
- Shutdown critical appliances on failure or emergency
- Fire -> shutdown HVAC + lights
- Air filter -> notification or auto replenishment
- Large water leak -> notification + option to call a Plummer
Beyond that you can make a bunch of buzz but the hardware isn’t ready.
Pick your battles right now, find something that wows people, and learn from its success while the big problems are tackled and the heavy lifting is done. And remember, the future isn’t not built over night, but 3-5 years should be enough.
The Exploration Process
There’s a story I’d like to share.
It’s a story of little sleep as many of these kind are. How do you produce something you have the tools for but not the knowledge? What about in a no fail scenario? One where any solution you come up with, in its final form, has to be 100%? You don’t sleep, you try a ton of different things, and keep your friends on speed dial.
Before the story I’ll get to the meat of the task: the steps to drive to get as close as you can to that 100% in the least amount of time.
1) Set a Hard Deadline
- A week or two is a good amount of time if not too long. < 2 days per revision. This will keep you honest and hungry.
2) Attack the task or portion of the project where you have ZERO idea what you’re doing.
- You can make up ground in places where your knowledge starts on a higher platform.
- It’s very possible that this task will be the part that causes the project to fail. At the very least you won’t see the problems coming. Better to give yourself the maximum amount of time to fall on your face and figure it out.
3) Use what’s already been done to support your driving into the pit of zero knowledge.
- Pull together and cut up fully manufactured plastic cases, repurpose electronics, anything that will be adequate to stabilize the rest of the project.
- You have experience in these parts. Use it to get to 80% quickly.
4) Make some things, break some things, it’s not going to work the first, second, third, or tenth time.
- Get it 85% functionally close to where you need it to be.
- If you’re using CNC anything, or precision anything at this point, you’re doing it wrong.
5) Find the problems and fix them.
- Google it, phone a friend, get to the bottom of why it’s not doing exactly what you want.
- It might be close, but don’t settle for close. Get the zero knowledge portion as close to exact as possible.
6) Dial it in.
- That last 15% is probably the stuff you actually have a basis of prior knowledge on. Great! Now you get to dial the project in.
- What’s wrong? Got it? How do you fix it? Need to redesign the whole thing? Ok, start working.
- Need to switch materials? Parts? Plans? Vendors? Do it. Be glad to move on from your first choice and onto something better. You’re now in search of precision.
7) Get one perfect.
- Got one working? 99%? Woooo! Now it’s time to pull out the CNC and get that ten thousandth tolerance you’ve been dreaming of.
9) Scale.
- You now have a manufacturing package put together of plans and everything you’d need to make 1000 of them.
- Hit the run button again. Make 20 of them. Hope nothing breaks.
8) Drink a beer and sleep.
- If done right, it’s been around a week or so of sleepless nights.
- You know way too much about something new and it needs to marinate in your brain.
- Sleep
Notes:
- This is not meant to yield a product which you can manufacture at tens or hundreds of thousands of units. It is meant to get the a base level of knowledge in an unfamiliar area and execute to a high degree of precision in small quantities.
- Like any good process outline, we need an example. To ground any process throughly in reality it means a human connection - emotions and thoughts. So how about the story now?
Building a Manufacturing Fixture in 3 Weeks.
I had the amazing opportunity of building a fixture to put new software on a product. Unfortunately it was not under the best of circumstances but that made for a ludicrous deadline. Perfect conditions to do something I had not even seen a picture of before. I was familiar with the concepts around making that type of fixture but application is understanding and I had never actually used a pogo pin in a project.
Queue The Process.
I had started this project and gone through the first three iterations prior to the hard deadline being imposed. The first two iterations were done as an exploration but I shelved it and tried another method. What I was doing just did not work. To be honest, those first two revisions were total shit. But they’re supposed to be as you stumble over your own two feet.
There were 3 main things I had to tackle with this build:
- I had never put a pogo pins into a project
- Alignment of the pins had to hit 0.2mm pads on the board
- The fixture had to be rigid enough for prolonged use.
Off the bat I figured I could get the alignment right and could build a rigid enough fixture to hold that alignment. I had zero experience with pogo pins - I’d seen a developer programing fixture or two but nothing meant to process thousands of units. So naturally this is where I started.
Rev 1
I started off at McMaster Carr browsing their “Spring Test Probes”. (McMaster does an incredible job of breaking down products into their simplest forms and then explaining all the variants they carry. Good resource if you’re just getting started on a project.) These were rather large. The smallest was 0.050” but given the overwhelming selection at Mouser and the lack of a DigiKey catalog to actually see what the components looked like, I went with the McMaster selection for the first go. The ABS plastics of the product case was used for alignment to make life a little easier. I offset the pins from the outer edge (2 data, 2 power, and a pin grounded for the bootloader), found some scrap acrylic that was roughly a good thickness, and started cutting.
I never got this variant to work. All the pins looked to be hitting correctly on their pads, albeit not reliably, but it would never connect to the computer when powered on. The root cause of this I wouldn't find out until I was on rev 4.
Rev 2
Rev 2, or what really should have been 1.5
Rev 2 needed to have smaller pogo pins and better alignment. Ditched the plastics and put dowel holders on the board. Offset the pins again cut out a new plate on the laser cutter andddd same issue. This really should have been rev 1.5 and not 2. I wrongly assumed the pins were not making good enough contact and needed to be more precisely aligned. Pit falls of sticking to what you know and not considering what you don't.
Rev 3
In comes Rev 3. Full redesign. After talking to some friends who know more than me in the electrical world, I found some very small pogo pins which were replaceable should they break and which I could get close enough to each other for the pads I was attempting to hit on the board. This was designed with a full manufacturing line in mind and not just a single person doing re-work of returned products. Clamps, lots of room around the components should something go wrong and need to be fixed, and strikingly good looks. It almost looks like a real thing at this point and not a shitty side project. I built only one of these which suffered the same fate at the others. The project was shelved until I could figure out why the device wasn't mounting to the computer.
Rev 4
This is where the deadline comes into play. A hard deadline. Roughly a half week after I designed and build rev 3, we were in need of the capacity to program tens of thousands of units. We needed 24 working fixtures by Friday. 6 Days. I pulled rev 3 off the shelf and began attempting to tune in the design. Luckily at this point I had some electrical hardware guys helping who pointed out that the data lines needed to be exactly the same length. This hadn't occurred to me and was exactly why none of the other fixtures had produced good results. Because USB is so fast if the two data lines at not exactly the same length you will get errors in the transmission. Differential signal transmission got added to my vocabulary (such an elegant solution to interference). Looking back at rev 1,2, and 3 with no wire management you can see why I would have a ton of noise in the signal lines. But, this revision worked! And in our brief testing (5 times) it worked 4/5 times. Good enough to attribute to construction and manufacturing errors. Time to make 24 of them...
With the parts laser cut and ordered we flew everything out to the work site and begin assembling. Testing started after 4 of the fixture were assembled. 2 of the 4 worked flawlessly. The other two had fits and starts. Not powering and then not mounting the device to the computer which I thought was a solved problem with our better wire management. All in all, there was about a 85% success rate with rev 4. Not bad but not the 100% confidence we needed. It was Tuesday and the deadline had been extended to Monday. There was another solution prepped and given I thought most of the issues were still alignment related, we elected to go with a CNC milled top hopping that this would be the final revision and to completely rule out any precision related tolerance issues.
In hindsight there were actually 4 things still majorly broken at this point:
We DID need more precision but the lack of it was due to both the process (laser cutting) and the material (acrylic).
The pin we were using for the boot loader was continually connected causing failures midway through loading the software onto the boards.
It was possible to apply power to the board before all the data pins were securely connected.
The two tiered design I had for constraining the pins was actually over constrained and causing poor alignment.
I have no idea how we were getting 85% success at this stage.
Rev 5
First cut of Rev 5 our of acrylic still
To fix some of the alignment issues, we switched to a single thicker top plate for constraining the spring pins. We had been using acrylic up to this point mainly because of the laser cutter which, after the first cut for rev 5, I was kindly reminded by our machinist what a pain it was to work with on the mill. His suggestion was to use StarBoard a marine-grade polymer which is super easy to machine, super light and durable, and crazy cheap for the quantity we wanted. 25 12" x 12" x 3/4" boards were around $150. Perfect.
While this was going on, another electrical inclined friend of mine based in our SF office taught me the difference between clean and dirty grounds. I had been making use of the dirty USB case ground to short out a pin on the NAND flash to invoke the boot loader. This caused some of the failures once the device was mounted on the computer due to the noise introduced into the system. Hence, “dirty” ground.
He made a makeshift sheath around the data usb lines going to the pins using the dirty ground. The data lines were as short as possible and now more insulted from the environment. The clean ground was routed through a toggle switch so we could remove the link between it and the bootloader pin once the download started. We then routed the power through a spate toggle switch of ease of use rather than having the board powered the second it touched the spring pings. Much more elegant. And better yet, it worked. Flawlessly and easily.
And finally… Rev 5
Beauty ain’t she?
The next 48 hours were a scramble to get the rest of the plastics, clean out two Radio Shacks of toggle switches, and soldering the new USB to spring pin harnesses for the 24 fixtures we needed. But at the end of the day:
Rev 5 in use. They got stickers for how many days they went without the need for repair.
Some notes on timelines:
- The whole process spanned roughly 3 weeks total.
- The majority of the work and the last 3 revisions were completed in less than 7 days.
- Rev 4 -> rev 5 was completed in less than 24 hours.
Some notes on the problems encountered in the build:
- When you use charge in a wire to communicate data (often called a signal) you better remember your physics.
- I still have a ton to learn about electronics and the design of electrical systems.
- Solving problems by yourself can lead to elegant solutions but you can get there faster with good friends.
- Starboard is my new favorite material. Seriously easy to work with.
There’s a lot more detail to this story and the context that prompted the need for this build but that really should be discussed over a coffee.

Festival Gear: Not your average glow things
I love things that glow. Most people do. Something about them screams future, life, presence. The only thing better than making something glow is making it react to the world or people around it. Not your average glow things but a piece that's prompts an audible "oooooooooo."
A very good way to get questioned at the airport
I love things that glow. Most people do. Something about them screams future, life, presence. The only thing better than making something glow is making it react to the world or people around it. Not your average glow things but a piece that's prompts an audible "oooooooooo."
So why not make some Converse of the future that glow everytime you step?
I had bought a pair of Converse Chuck II's when they first came out. Great shoes. Highly recommended. But they would be better if they had lights on them. More specifically, lights that reacted to your every step. Not a new concept - if you were a kid in the 90s you desperately wanted a pair of LA Lights - but one worth exploring.
The issue with LA lights or the lot on Amazon and Ebay is the response time. You step, they light up a second later or worse send a chase patter around the individual LEDs on the shoes. OK for one step but some place where you'll dance your face off. I really wanted an almost instant response.
I had made a sound reactive backpack outlined in EL wire a couple years back that had a wonderful response time to the beat of the music playing. Great place to start. (I upgraded the backpack with much brighter lighting, new batteries, and a controller. I'll include pictures at the end of the post.)
So where do we start? Well what do I absolutely have to get right?
Requirements:
- 18 hours of runtime. Thats's 3 days x 6 hours a night. Conservatively I assumed they would be on whole time even though in practice they would be off when I was not moving.
- Contained on the shoes. Didn't want a wire running up to the backpack. Just less of a PINTA.
- Lite weight. Going to be strapped to my feet after all
- Fast reaction to every step. Had to keep up and react faster than I can move my feet (not that fast).
- Bright. They needed to be noticeable when on in the dark.
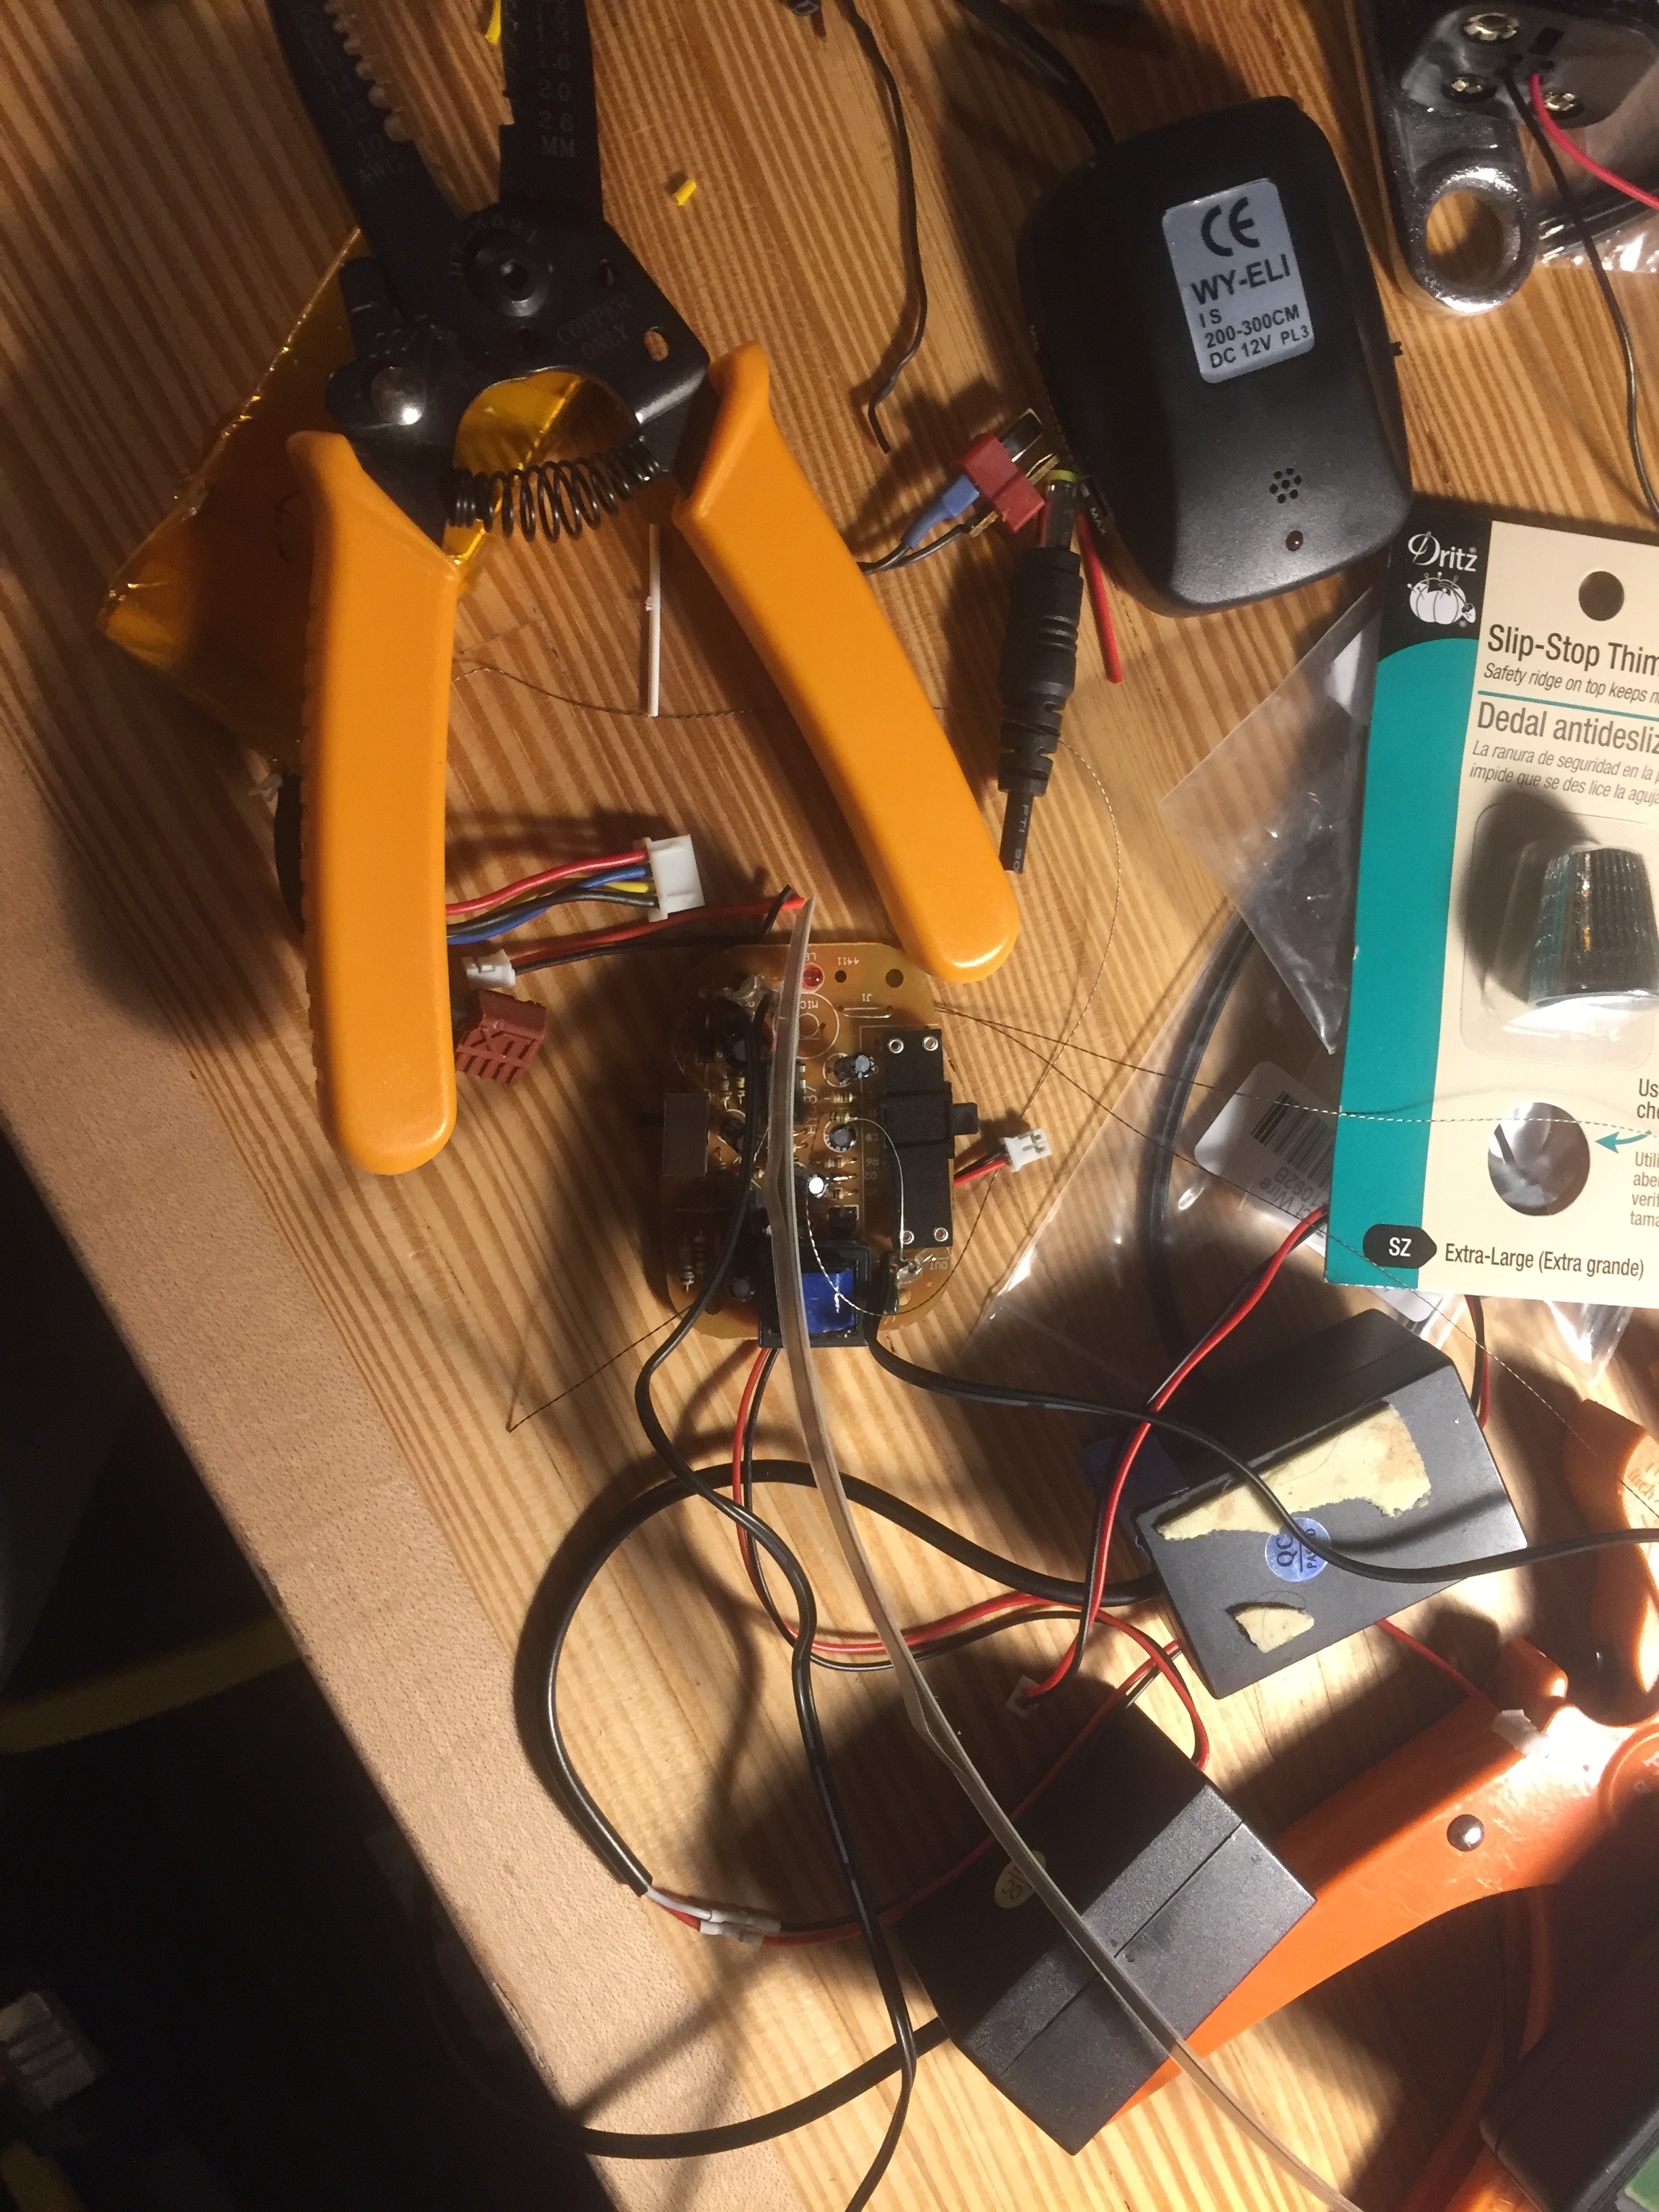
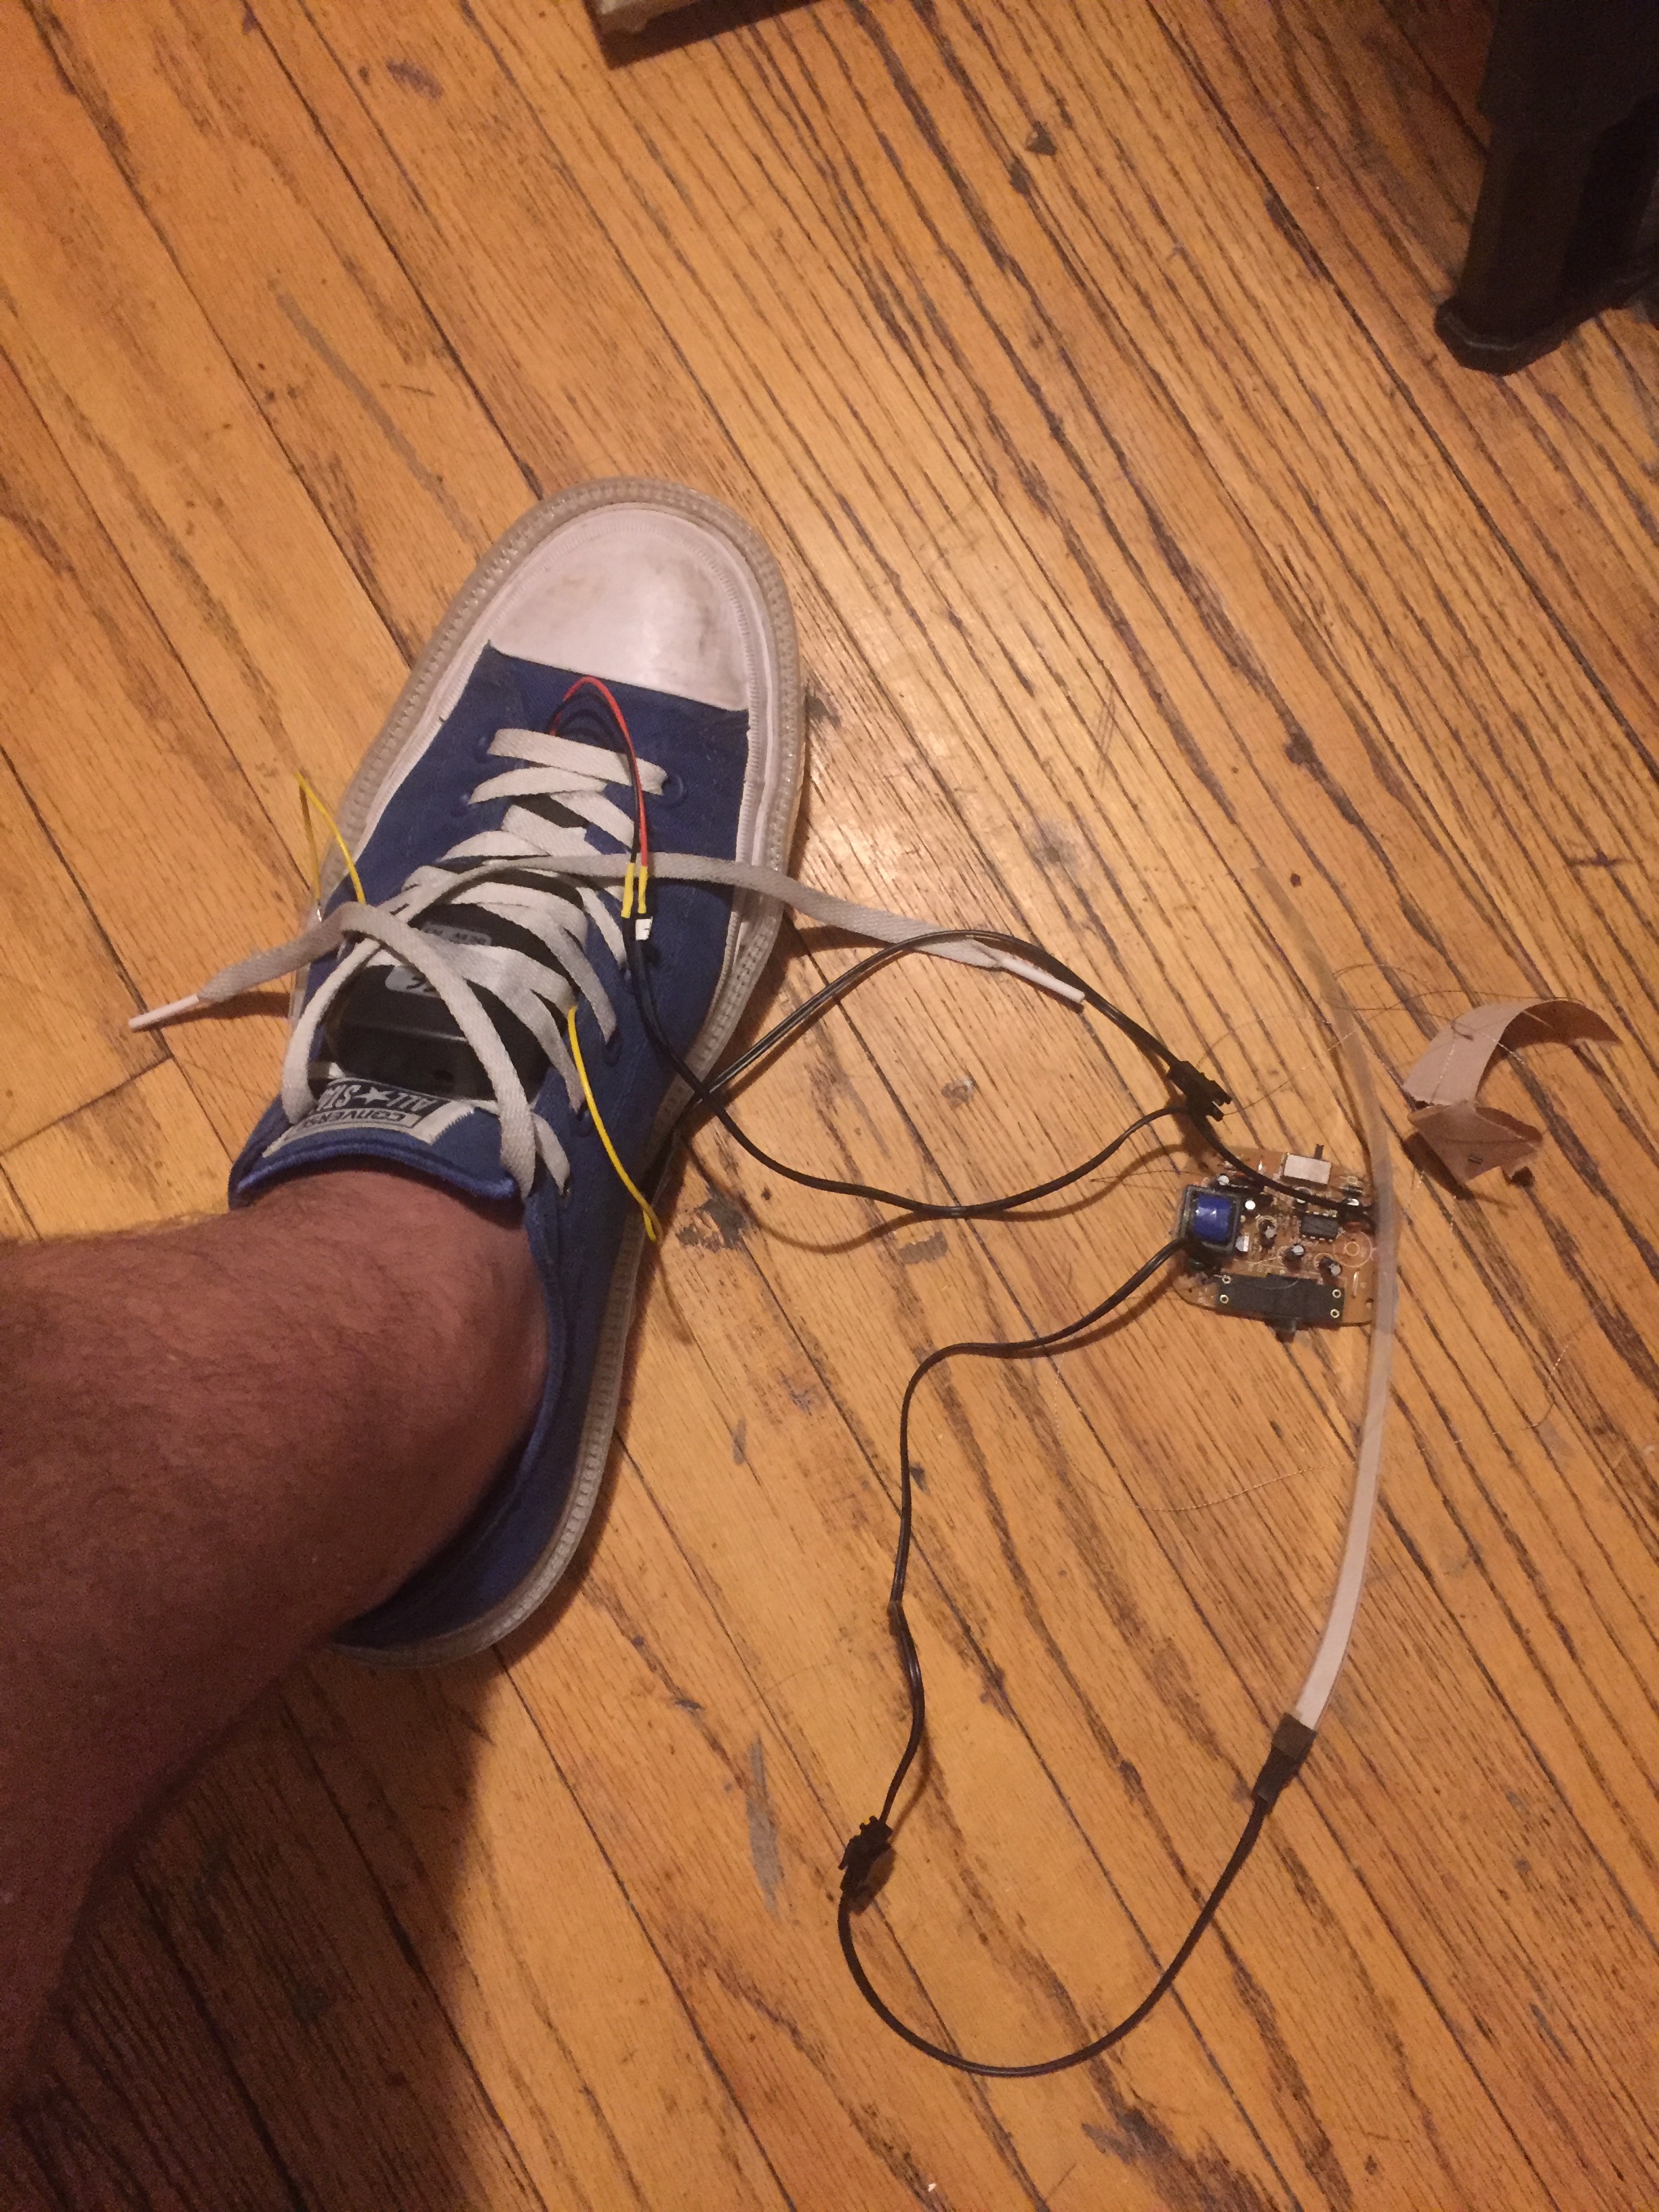
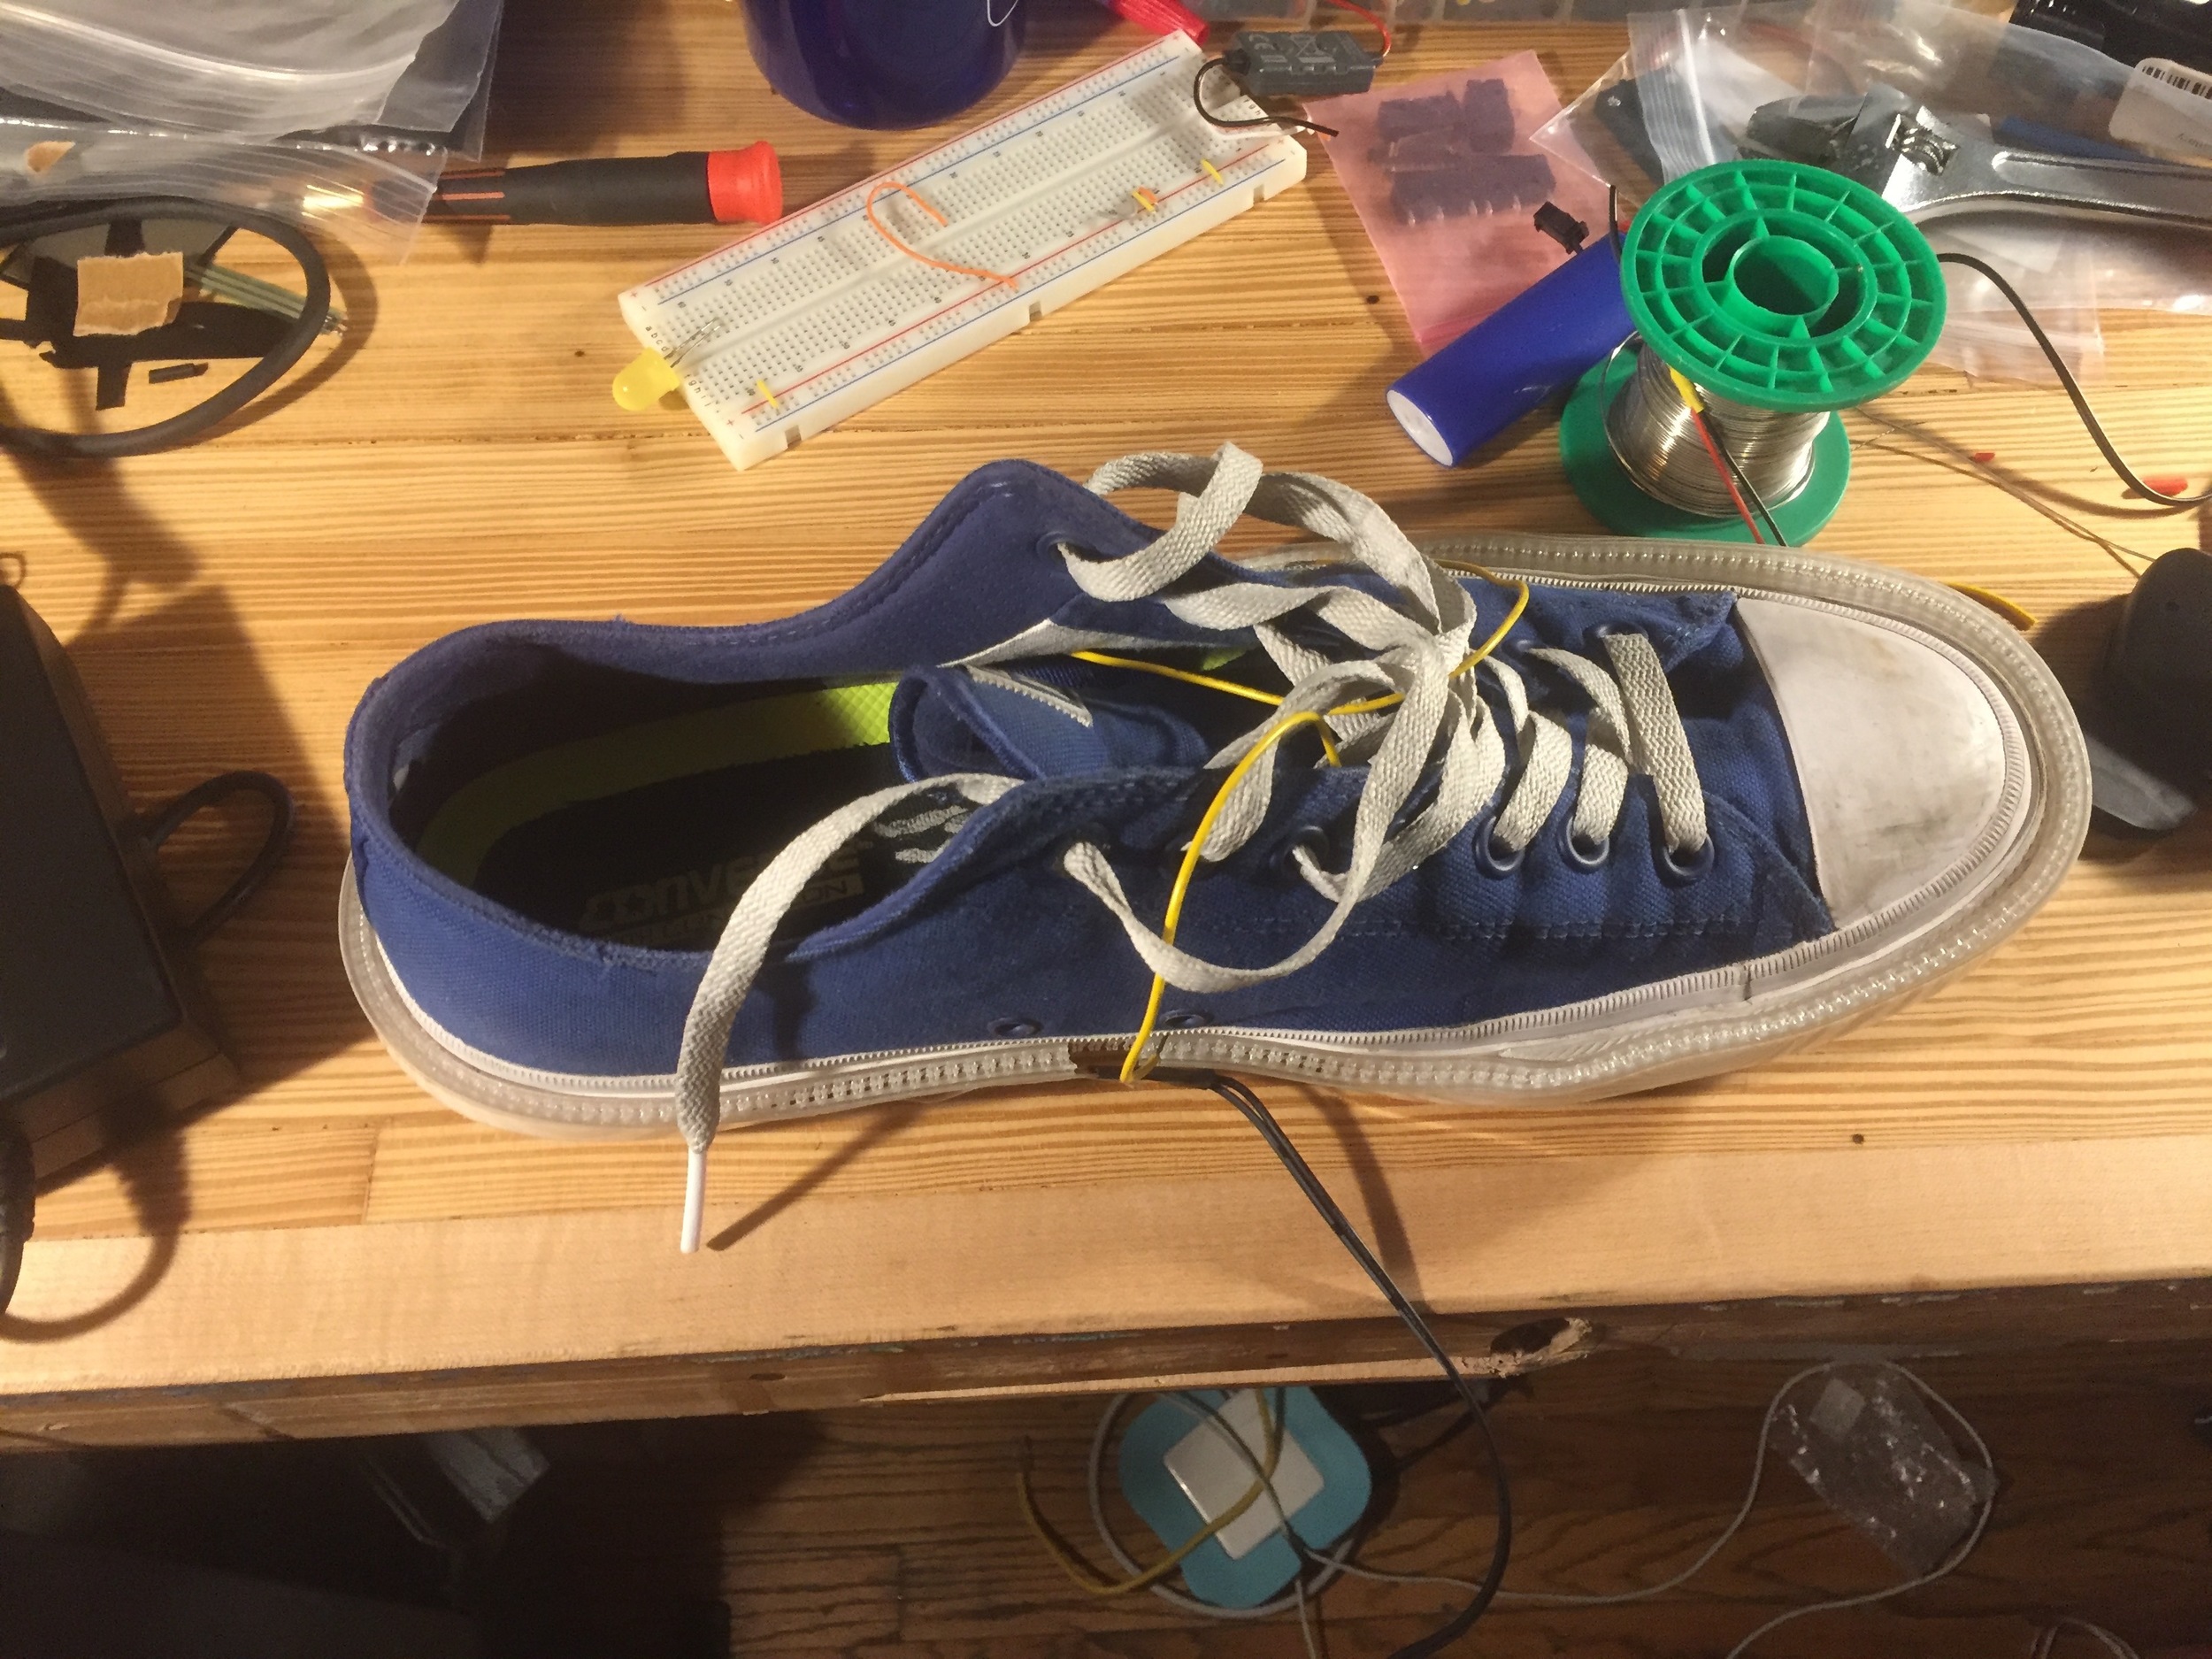
First I need a pressure sensor for under the heel to sense when I step. Ok easy. Force Sensitive Resistors (FSR) are your standard pressure sensor. Problem: they're relatively expensive for what they are and fragile. Solution: Velostat! This wonderful material drops its resistance based on the pressure applied but was developed as an ESD material. Awesome stuff. It's cheap and it makes a pressure sensor of any reasonable human scale size easily with two wires attached to either side.
I decided to use EL tape around the bottom white portion of the converse for the lighting. It's bright, durable, and awesome looking. First issue: electroluminescent lighting is a AC power capacitive light source. This means I need to go from the DC power of a battery to the AC power needed for the EL Tape. Which means a battery, a controller for the sensor input, and an inverter.
There is where China comes in (yayayayay). Remember that backpack I was talking about? Well it just so happens the sound reactive controller I used for it takes care of the controller and and inverter portions. The controllers have a mic and a gain adjustment for different sound levels. A microphone is a pressure sensor and with a gain I could probably get away with replacing it with the Velostat directly and using the gain to tune the controller in. This worked remarkably well. I ended up bottoming out the resistance of the pressure sensor when standing on it which go the controller to go to steady state and produce no light. Perfect. The lights would only come on when I picked my feet up.
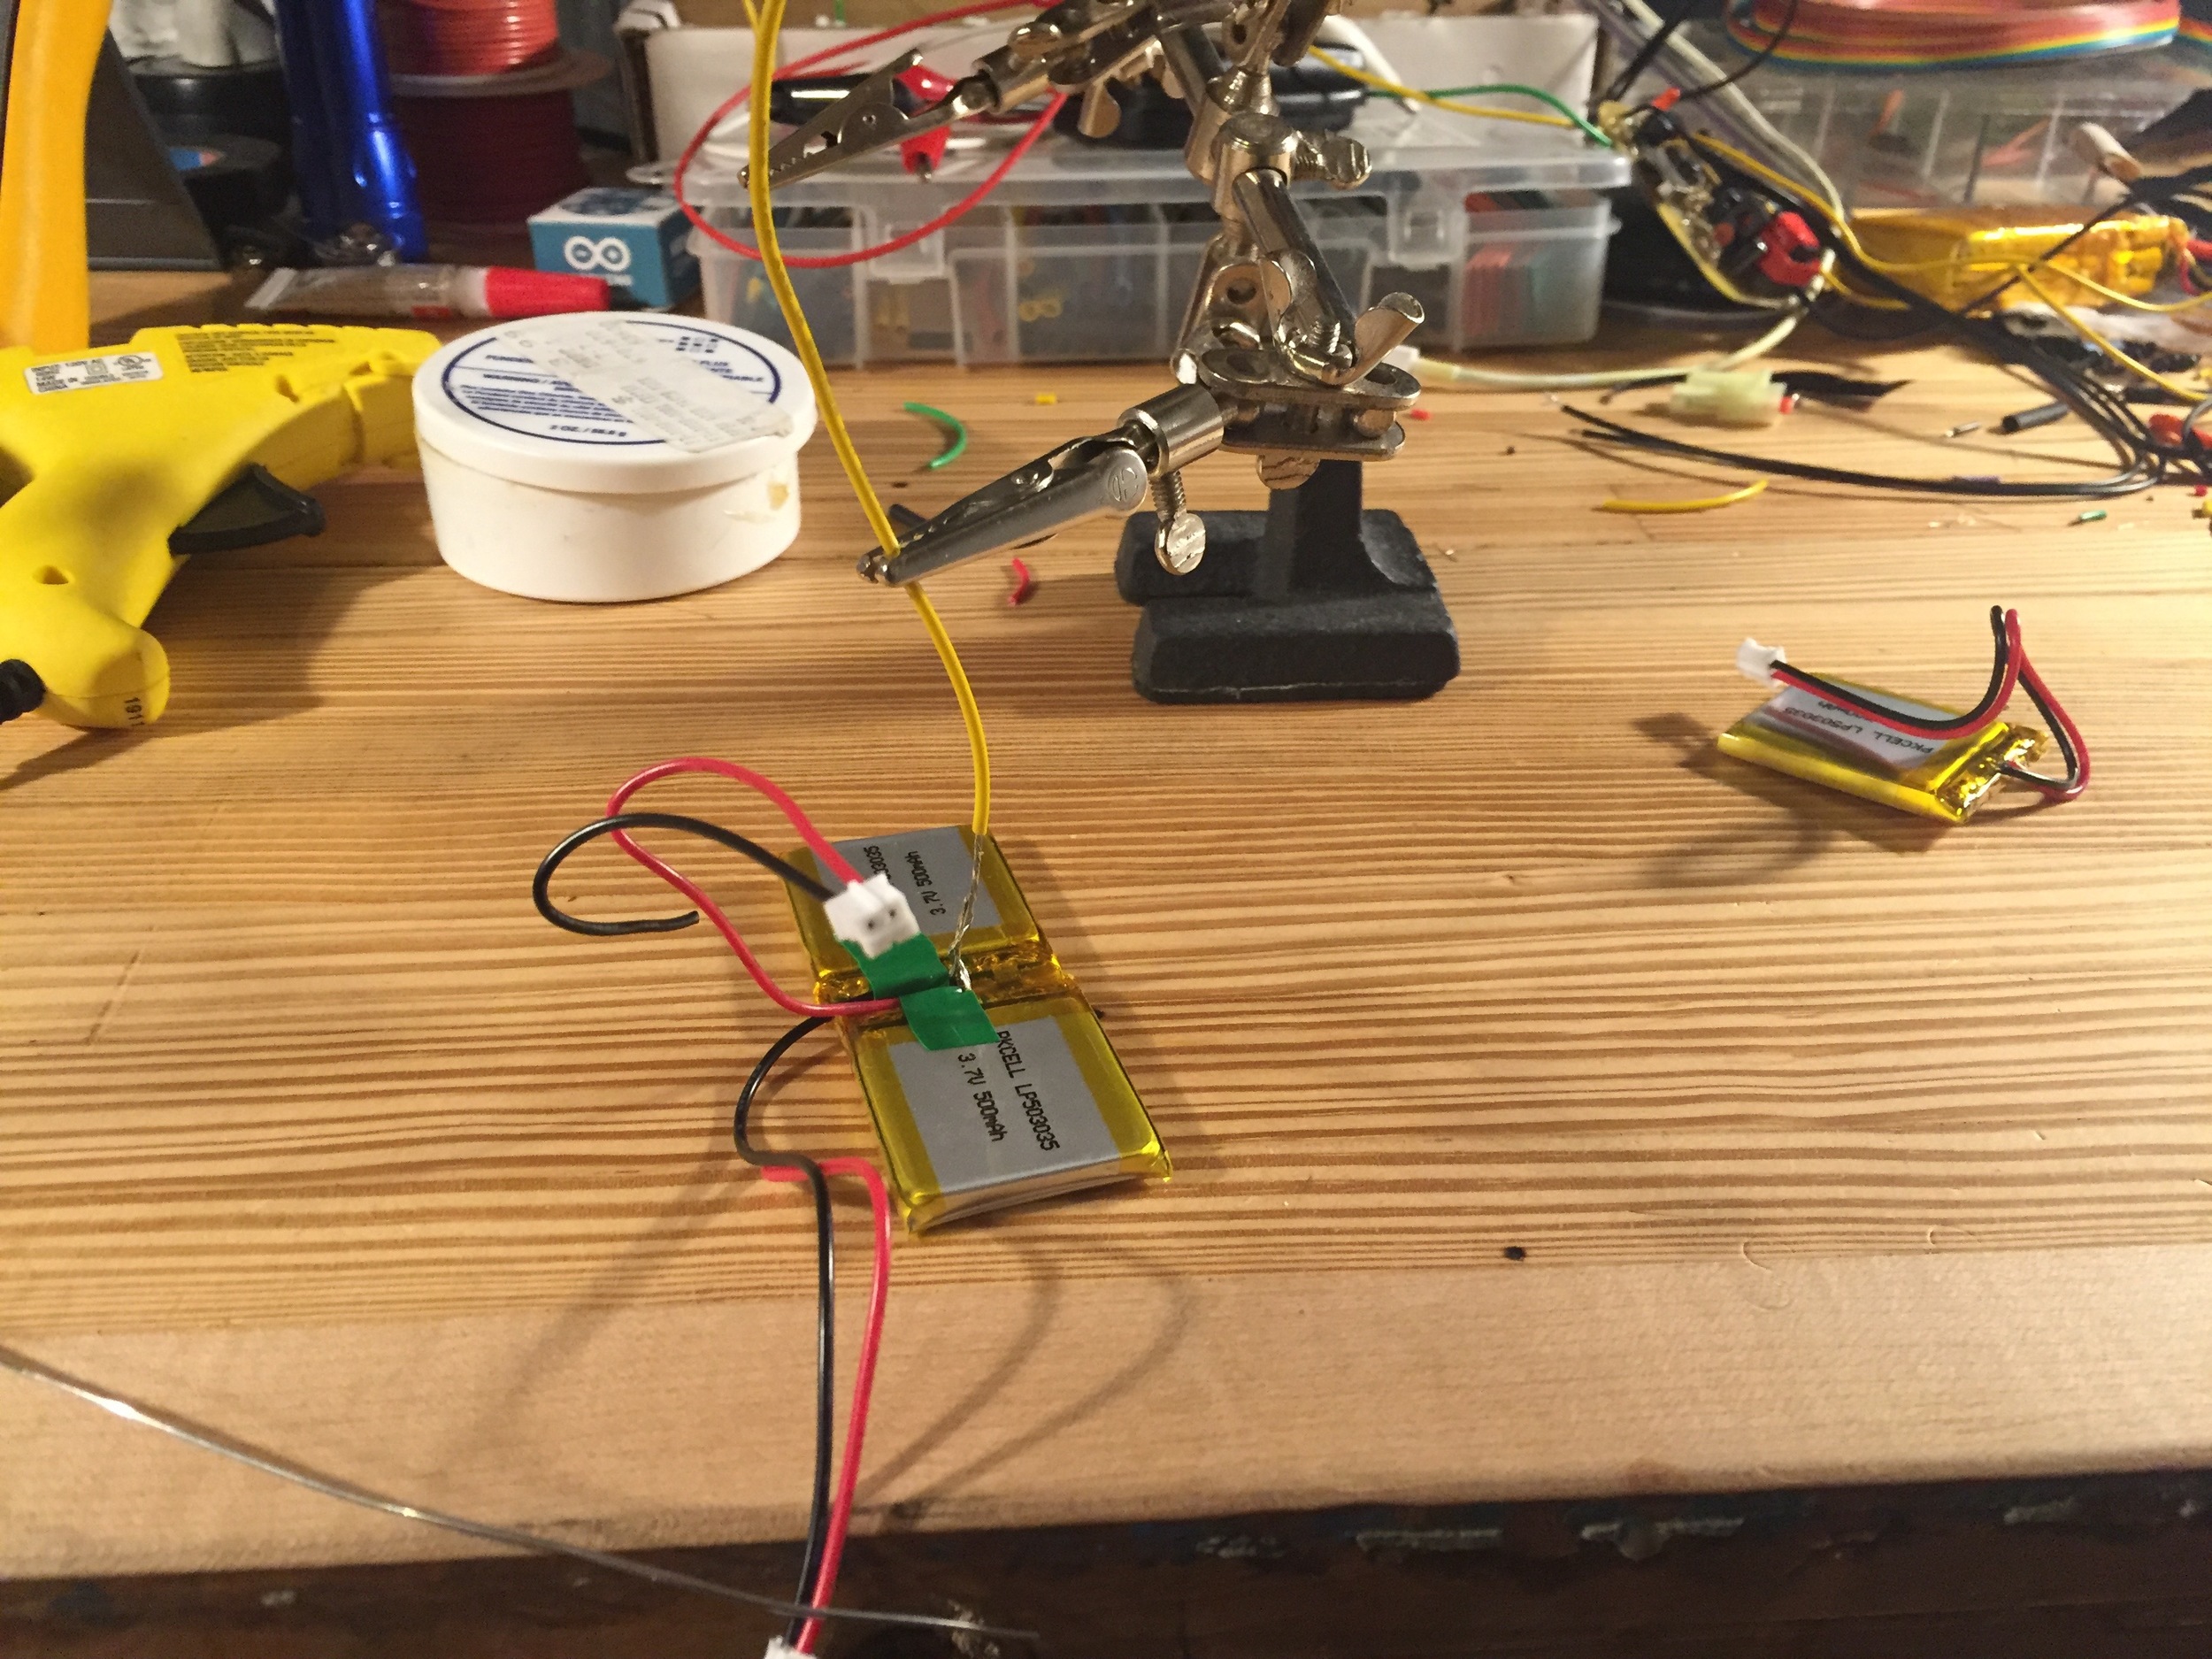
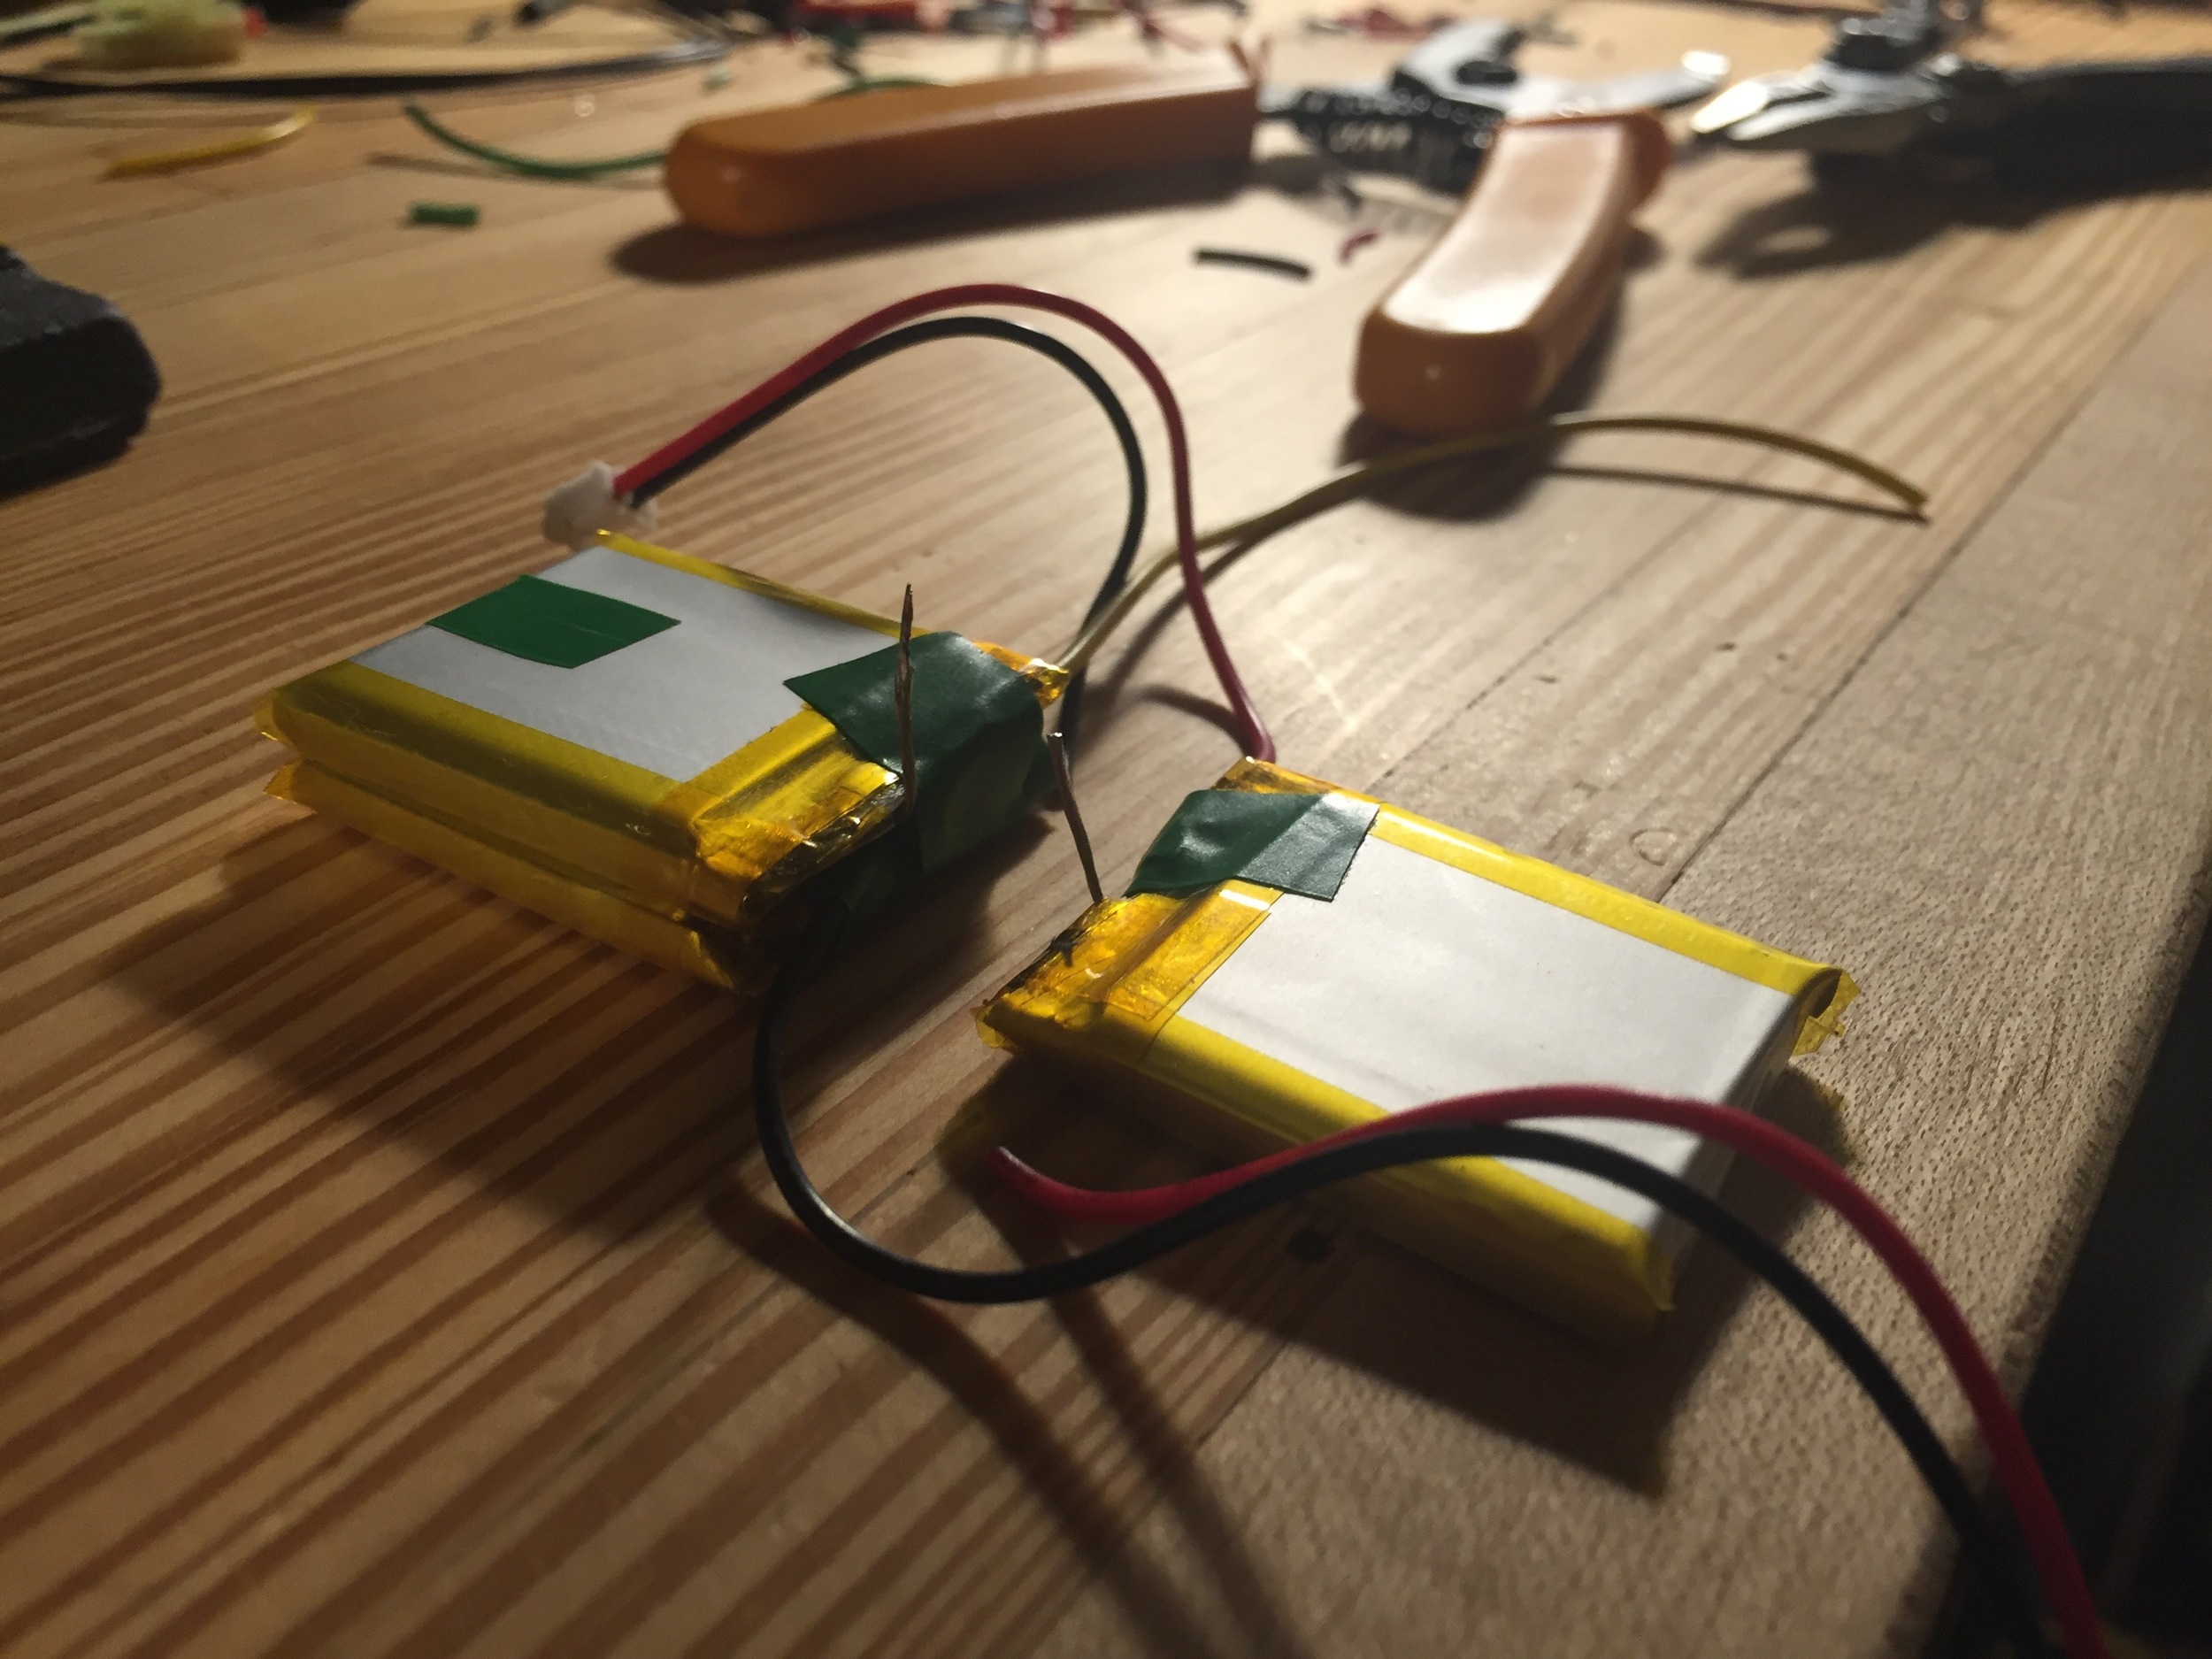
With the controller already sizable I had to make sure the batteries were small. I opted to try a 6V pack made of 2 coin cell batteries (Thanks Adafruit for the inspiration). After wiring everything up it was just not bright enough. I needed to use the 12V controllers which meant a bigger battery. Which meant to keep the size down I needed a small LiPo pack. Easy enough. 3 individual LiPo cells for a 3s1p (3 in series, 1 in parallel) battery pack with a rating of ~12 volts and 500mAh. The amperage draw of the EL tape on was less than 25mA which gives me about 20 hours of runtime. When building battery packs one must use a lot of electric tape/heat shrink/care. LiPos are nasty when they explode.
After everything was assembled and glued onto the shoes I ended up with something that was pretty awesome. Here was the quick and dirty test run with the wires all over the place:
Super sketchy looking but awesome output and reaction time. Video in the dark below.
Some more pictures from the build and the light up power button for my chest that turned my backpack on and off. Might do a post of them but not nearly as interesting as the shoes.


Reality + : A more informed environment
Insert virtual reality rant here
There is always a contingent of people in the techology sector looking for the next big environment - the next big platform. These people see virtual reality and think, a world where I can create anything for people to consume? Amazing! I need to make this into our next platform, our next moonshot, our next big effort for when it happens in 10 - 20 years!
These people are wrong. Virtual reality will have its place but it's not in the everyday nor is it the first thing you'll reach for in the morning when you get up. It's going to be an immersive gaming experience or a way to pre-view your vacation but it will not replace that vacation. We're not going to be become:

Image shameless take from @burenothebear
People like reality, people want reality, people love interacting with the world around them. What drives people away from the want to interact with their environment is the fear and anixiety created from the unknown and unfamilar. These barriers block information from being easily digested and recognized. What we want is Reality +.
We want a world that is marked up with the information we need. We want hotel rooms that inform the valet to pull the car around when we are leaving the room. We want to know which button to press for hot water. We want information that gives us clues to the decisions we are about to make. Ideally what I am describing is good design. But just good design is lacking. We need a spacial design that uses technology to better orient us to our ever changing environment. This is Reality +.
There is an opportunity with the tech around us to enhance the environments we are is. The most used at the moment is iBeacons with push notifications to your cell phone. But this is just the begining. How we harness these embedded technologies that are now all around us will create something new. Thinking Microsoft Hololens. Something better informed. It has to be more than augmented reality though. Something more personal and less forceful, something like Reality +.
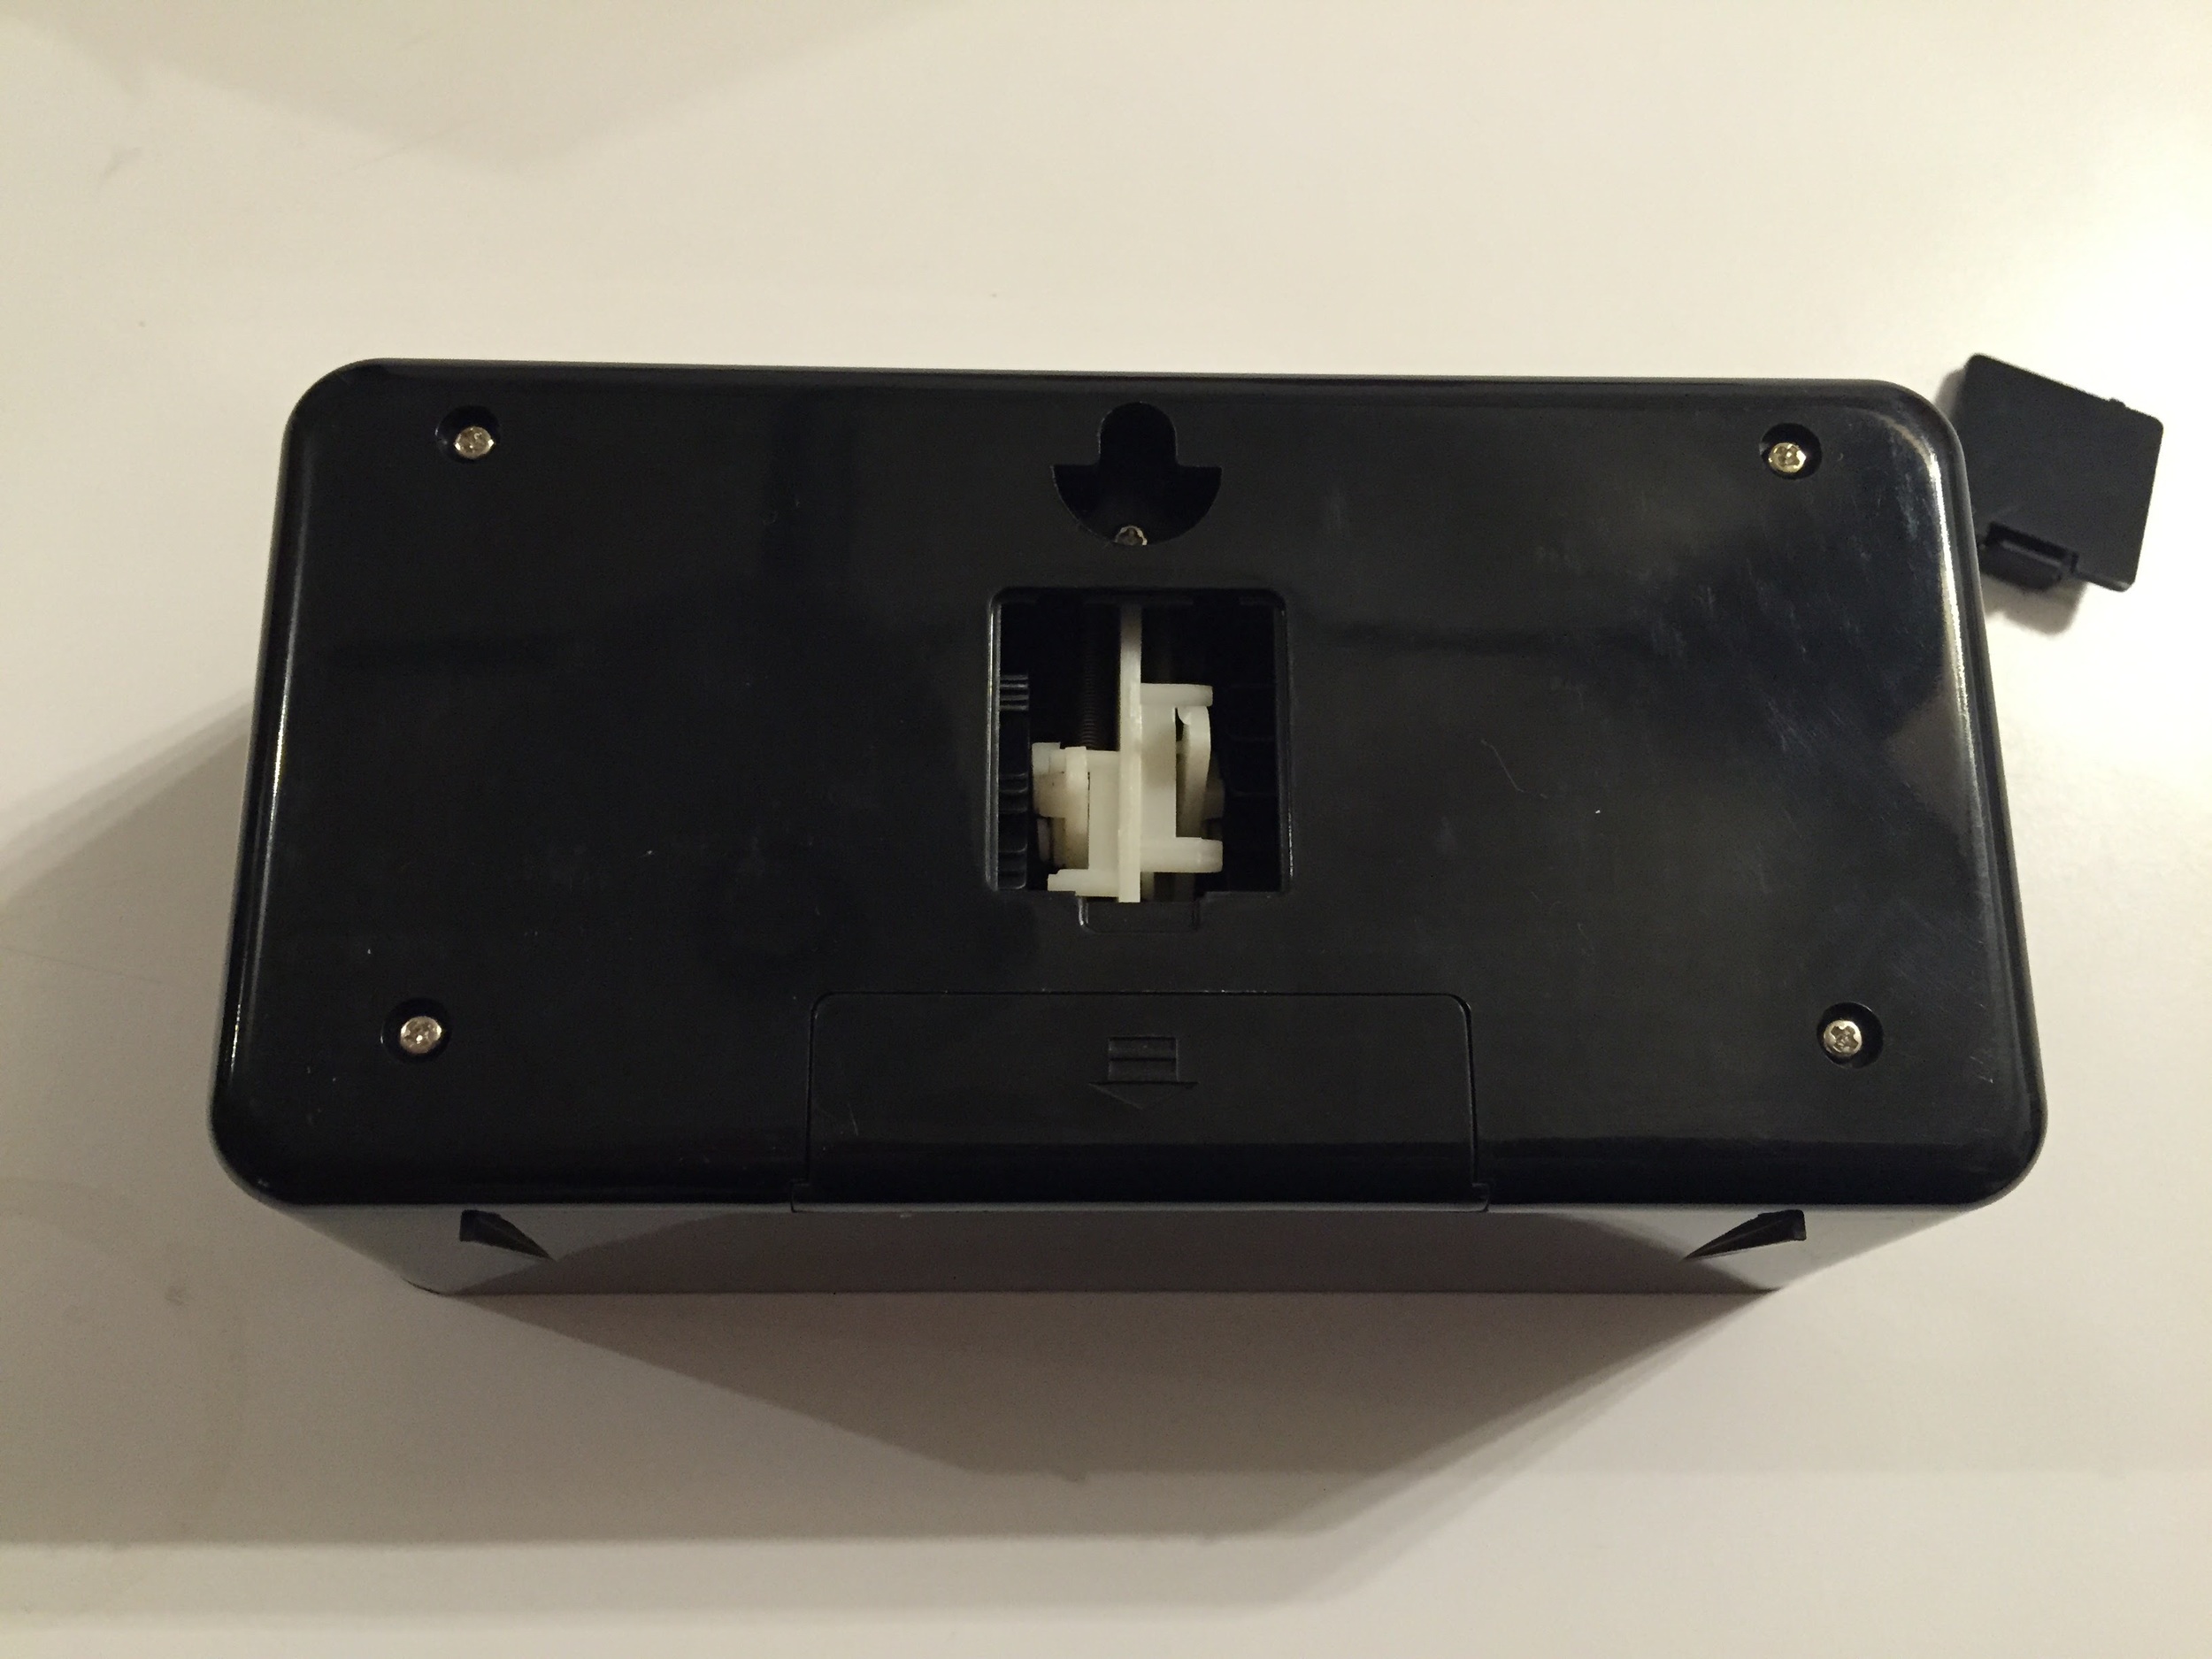
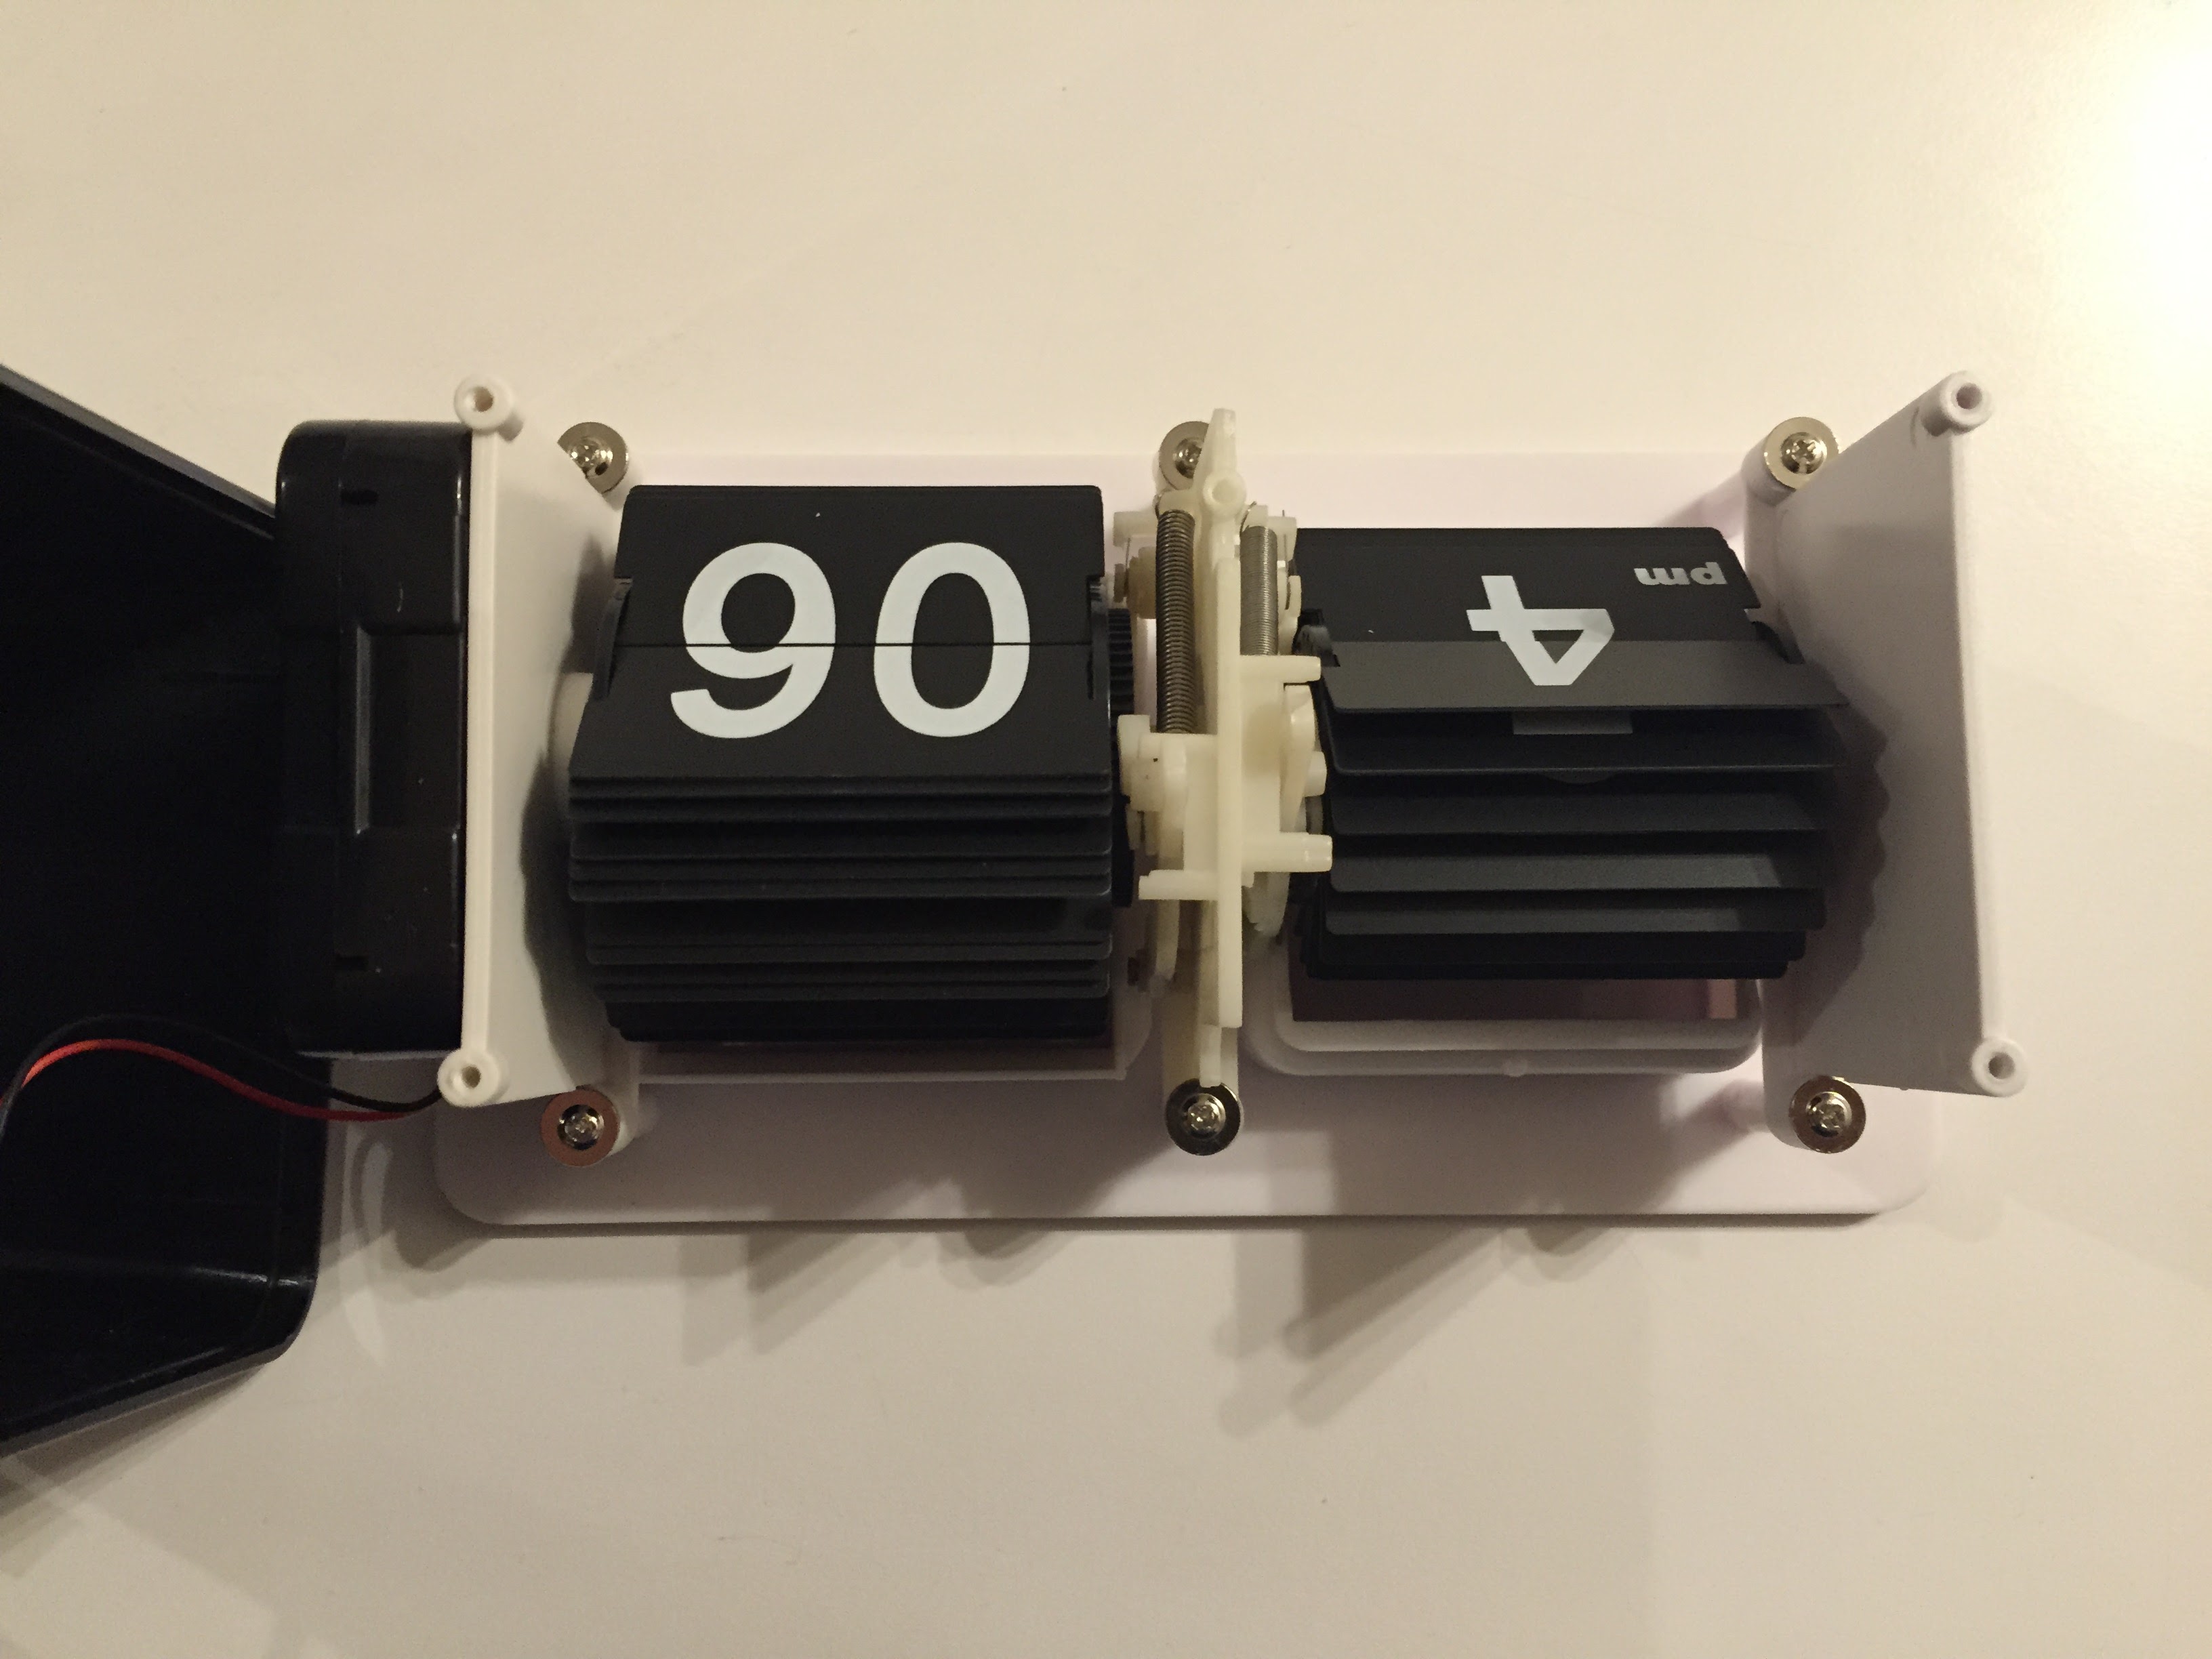
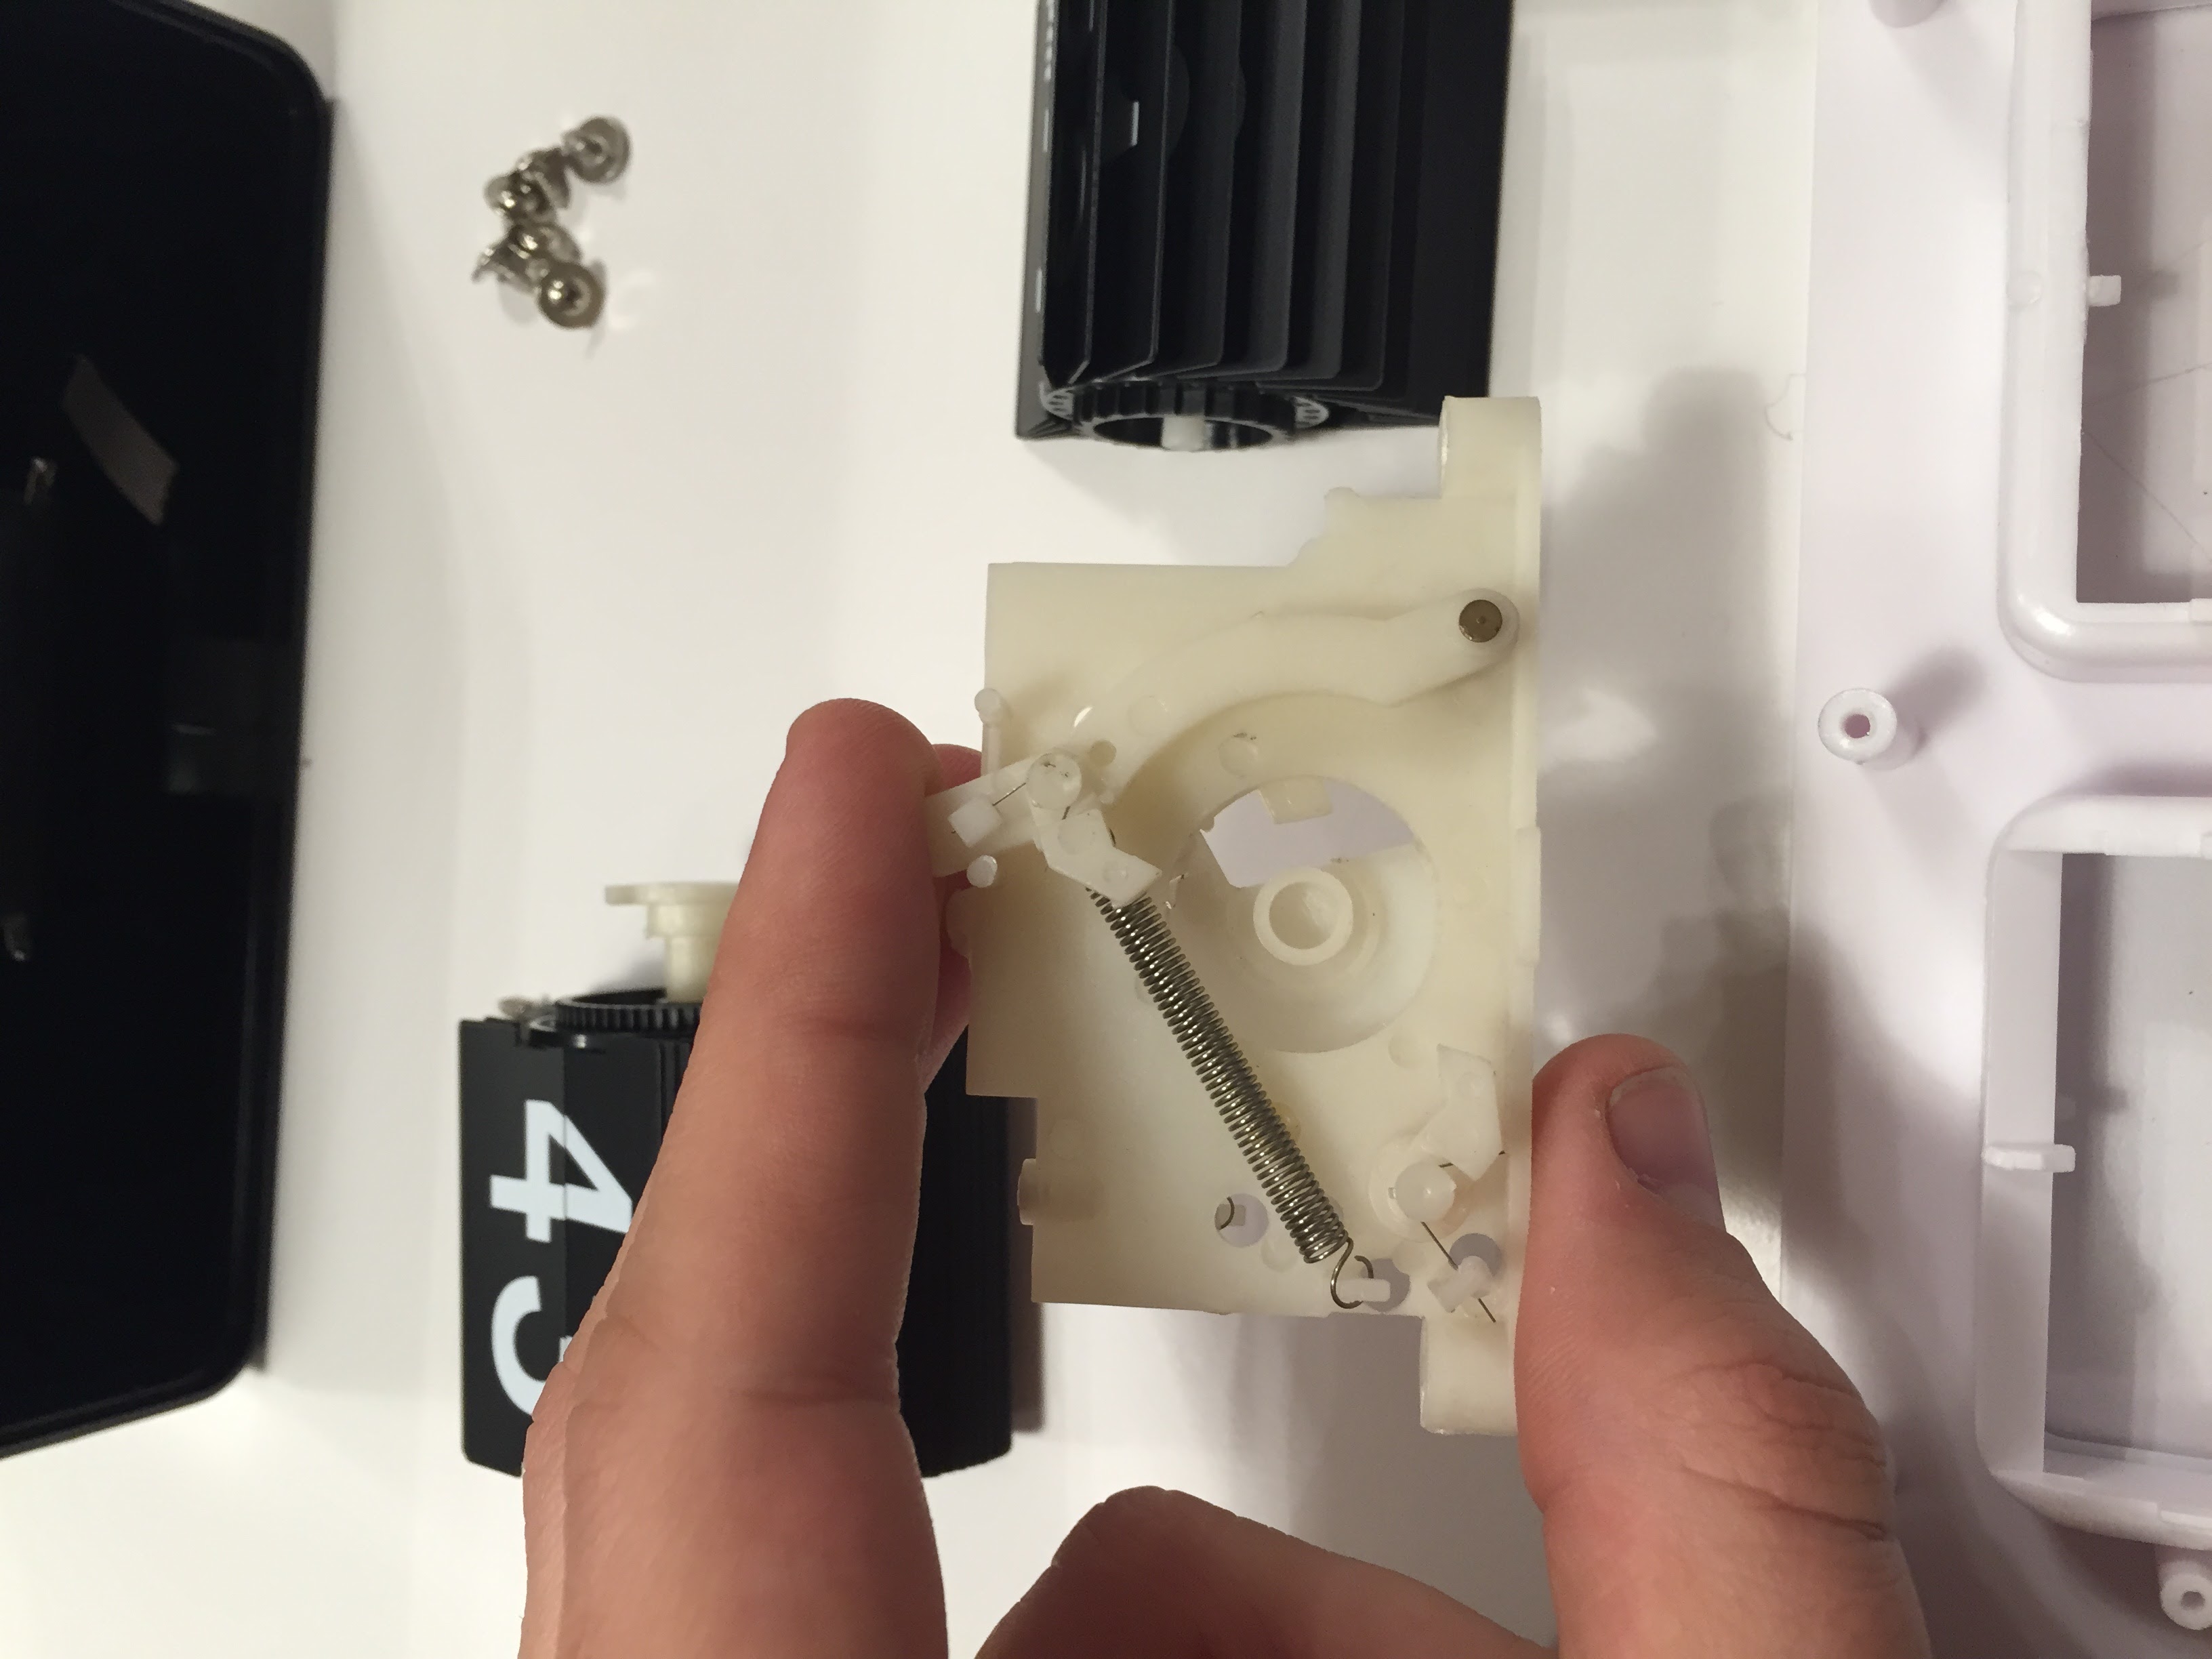
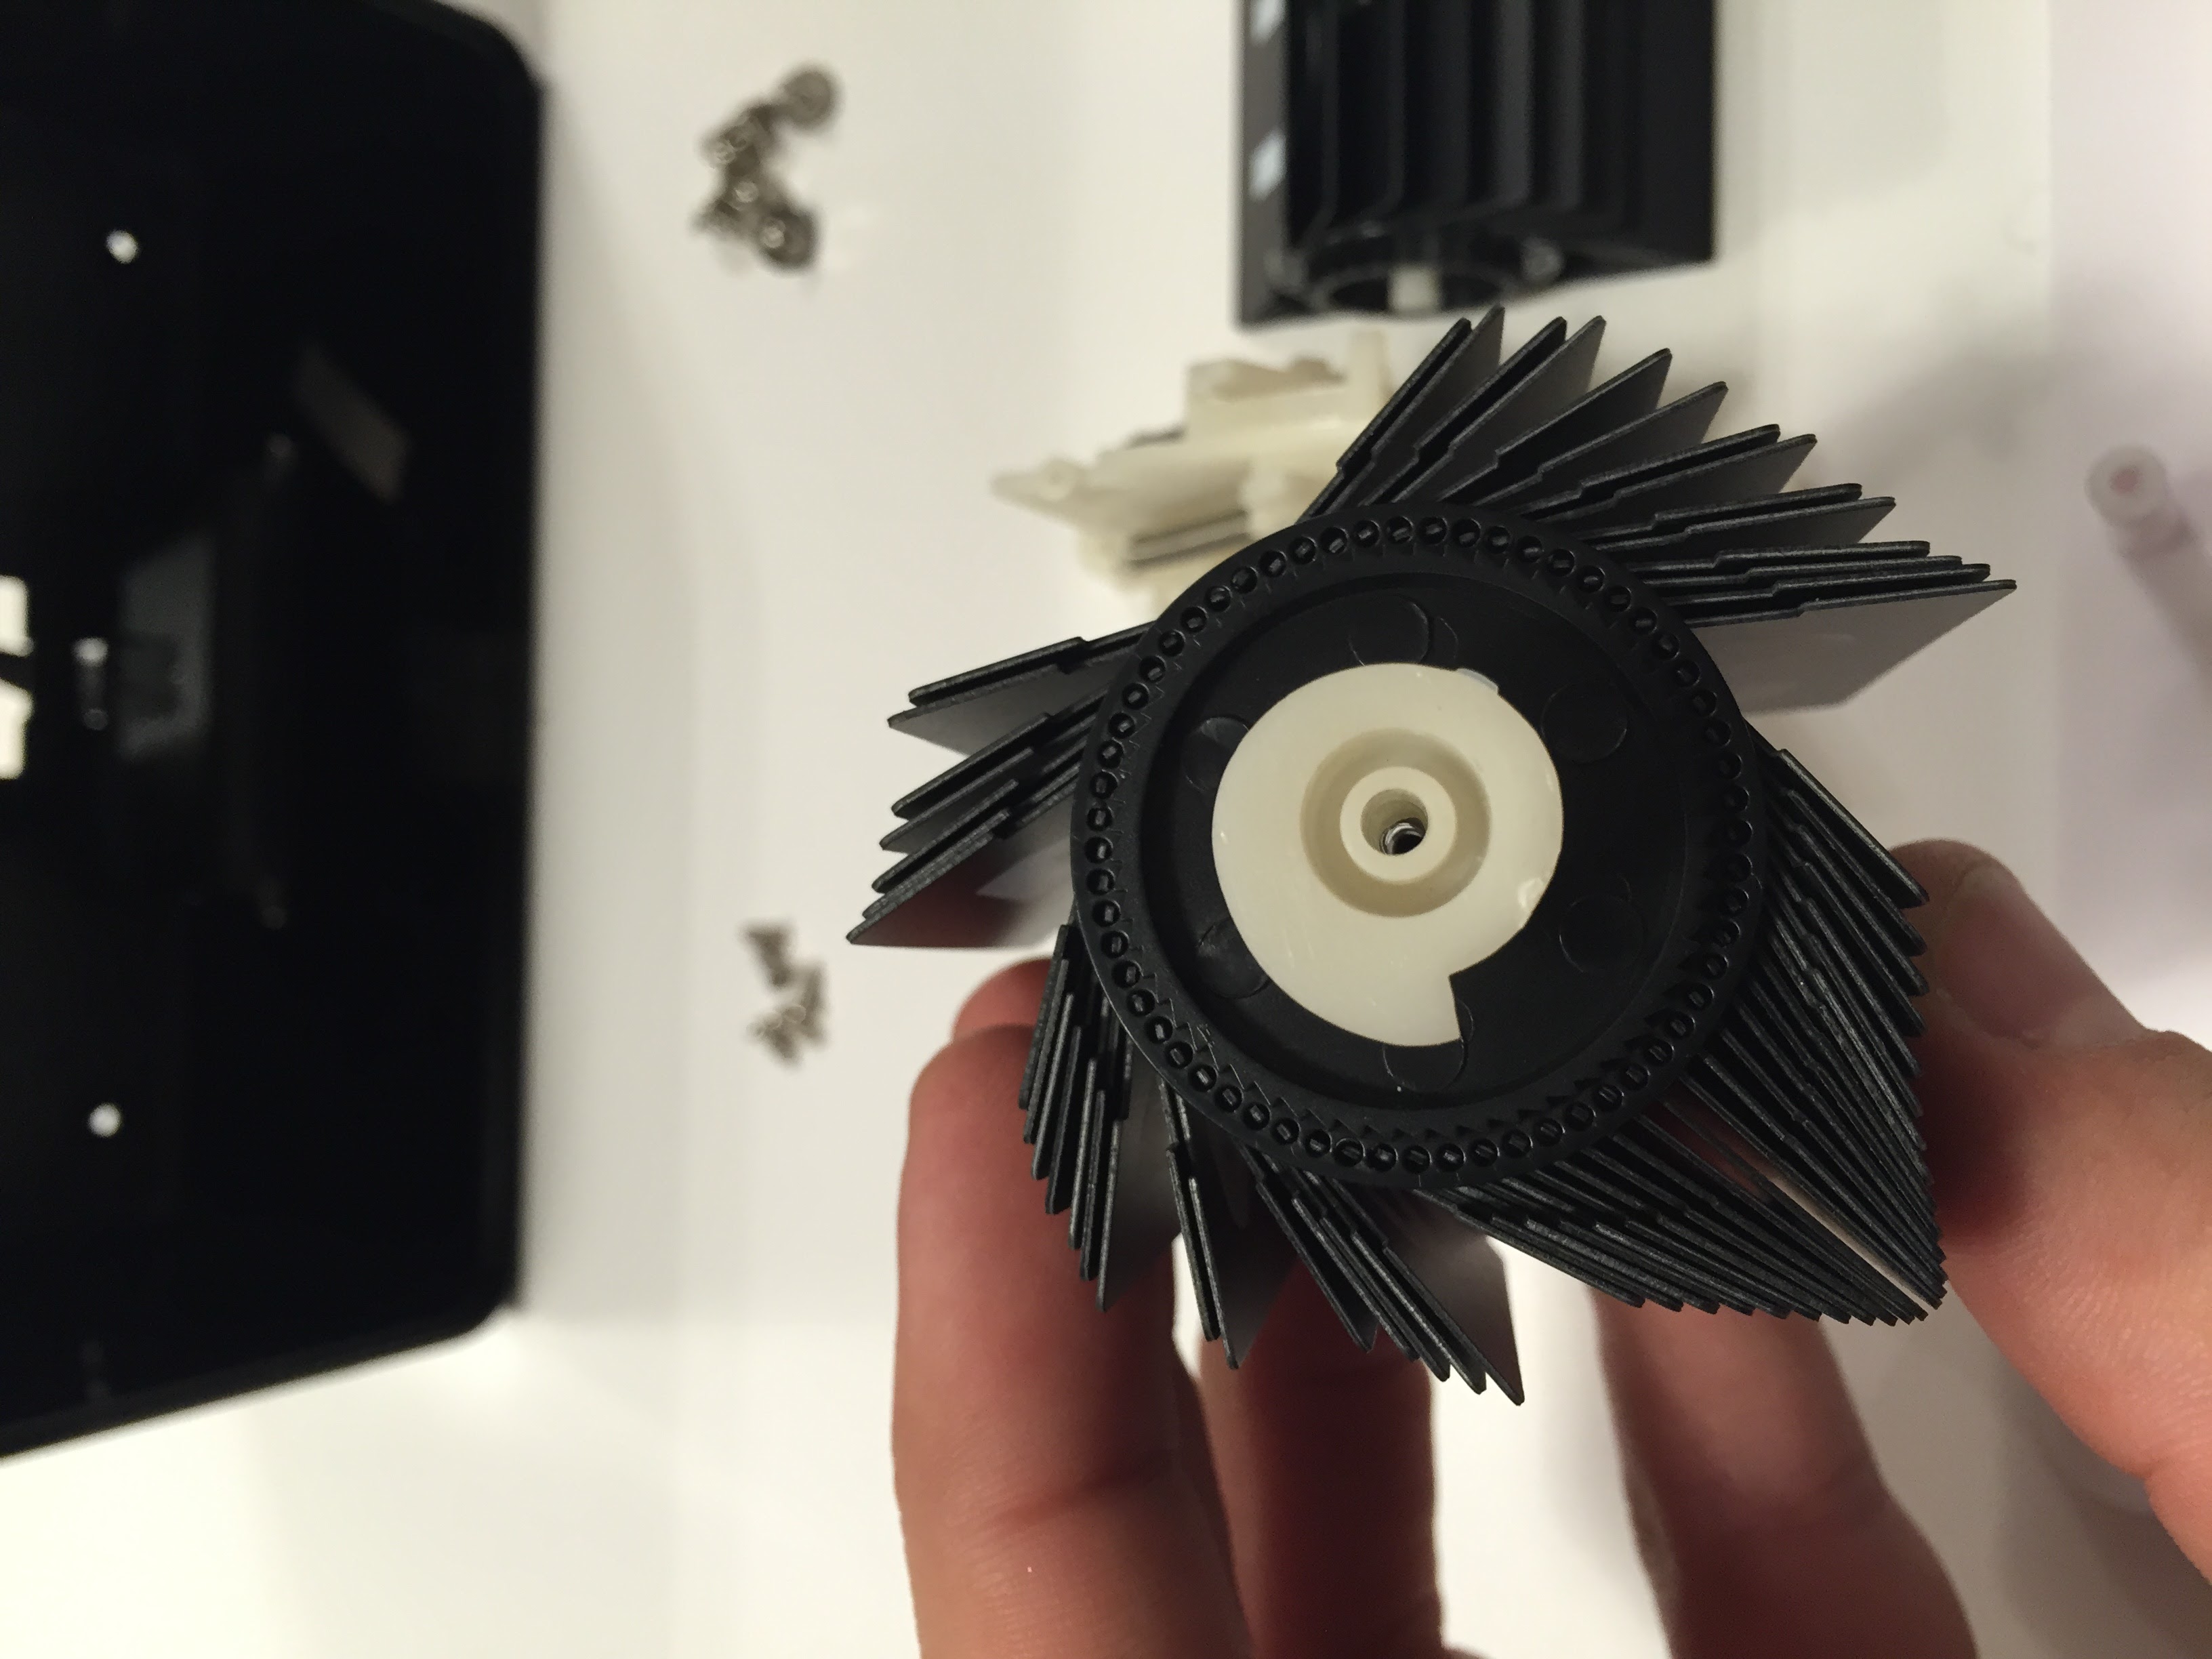
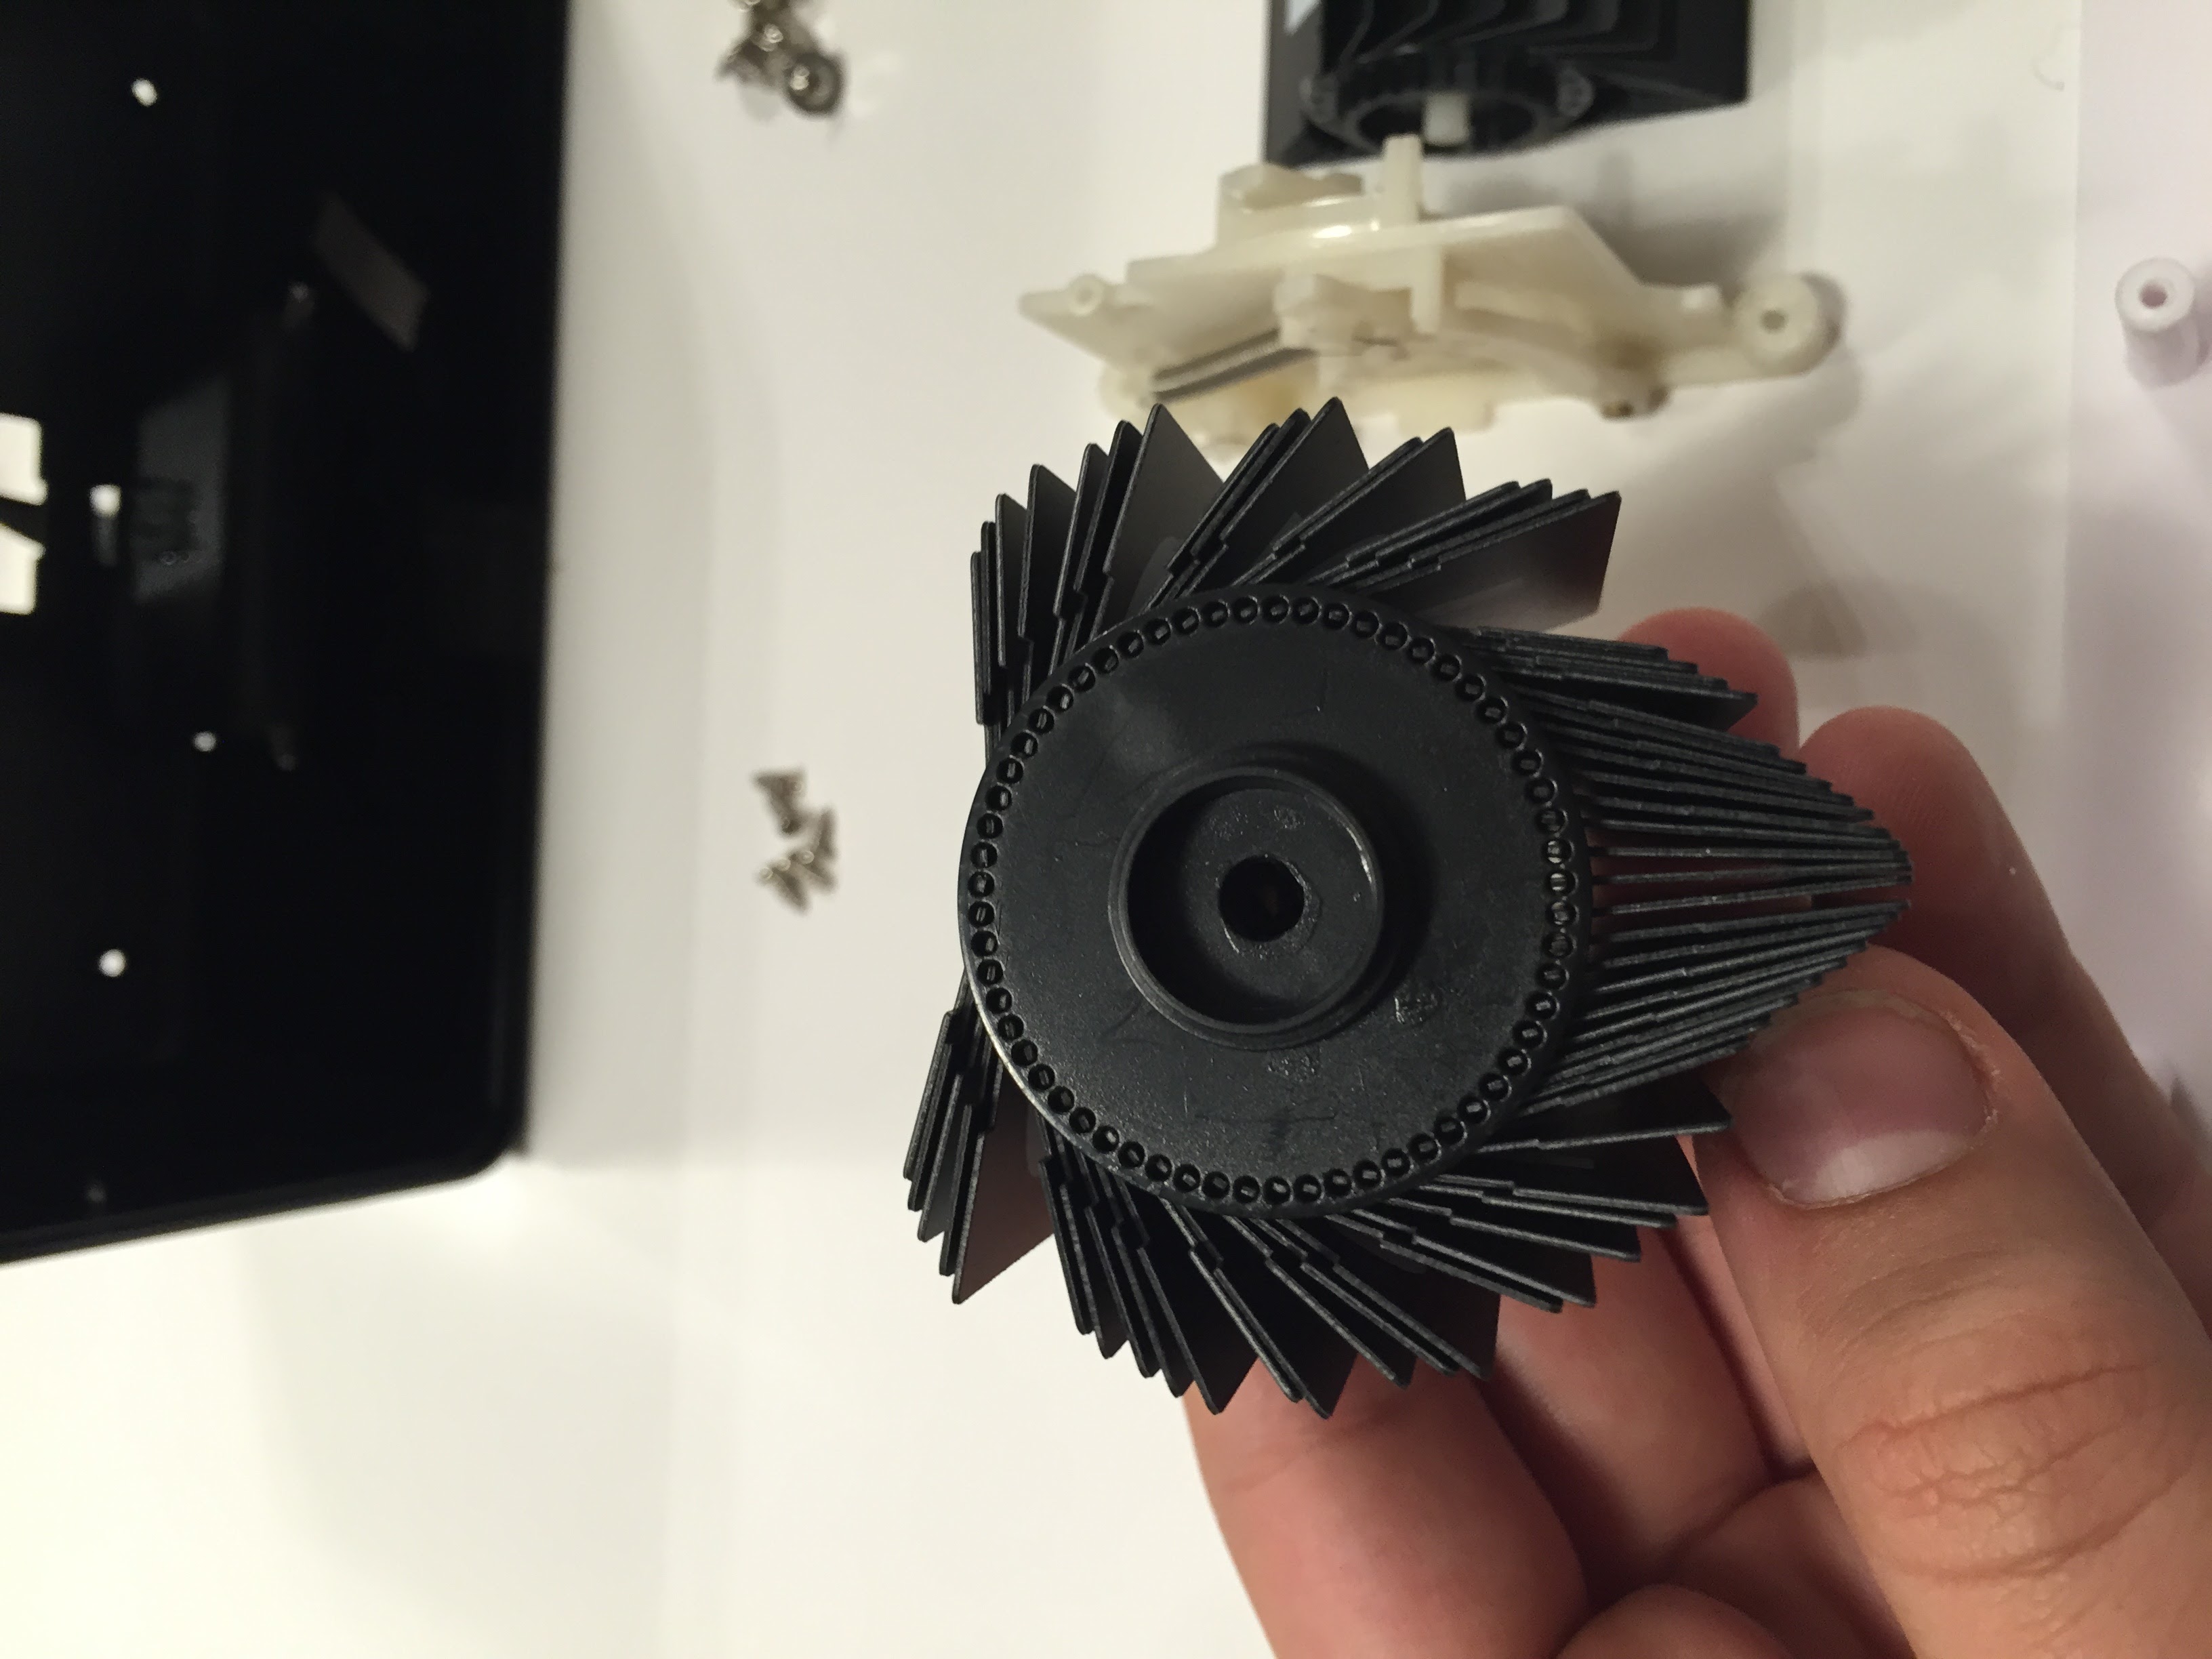
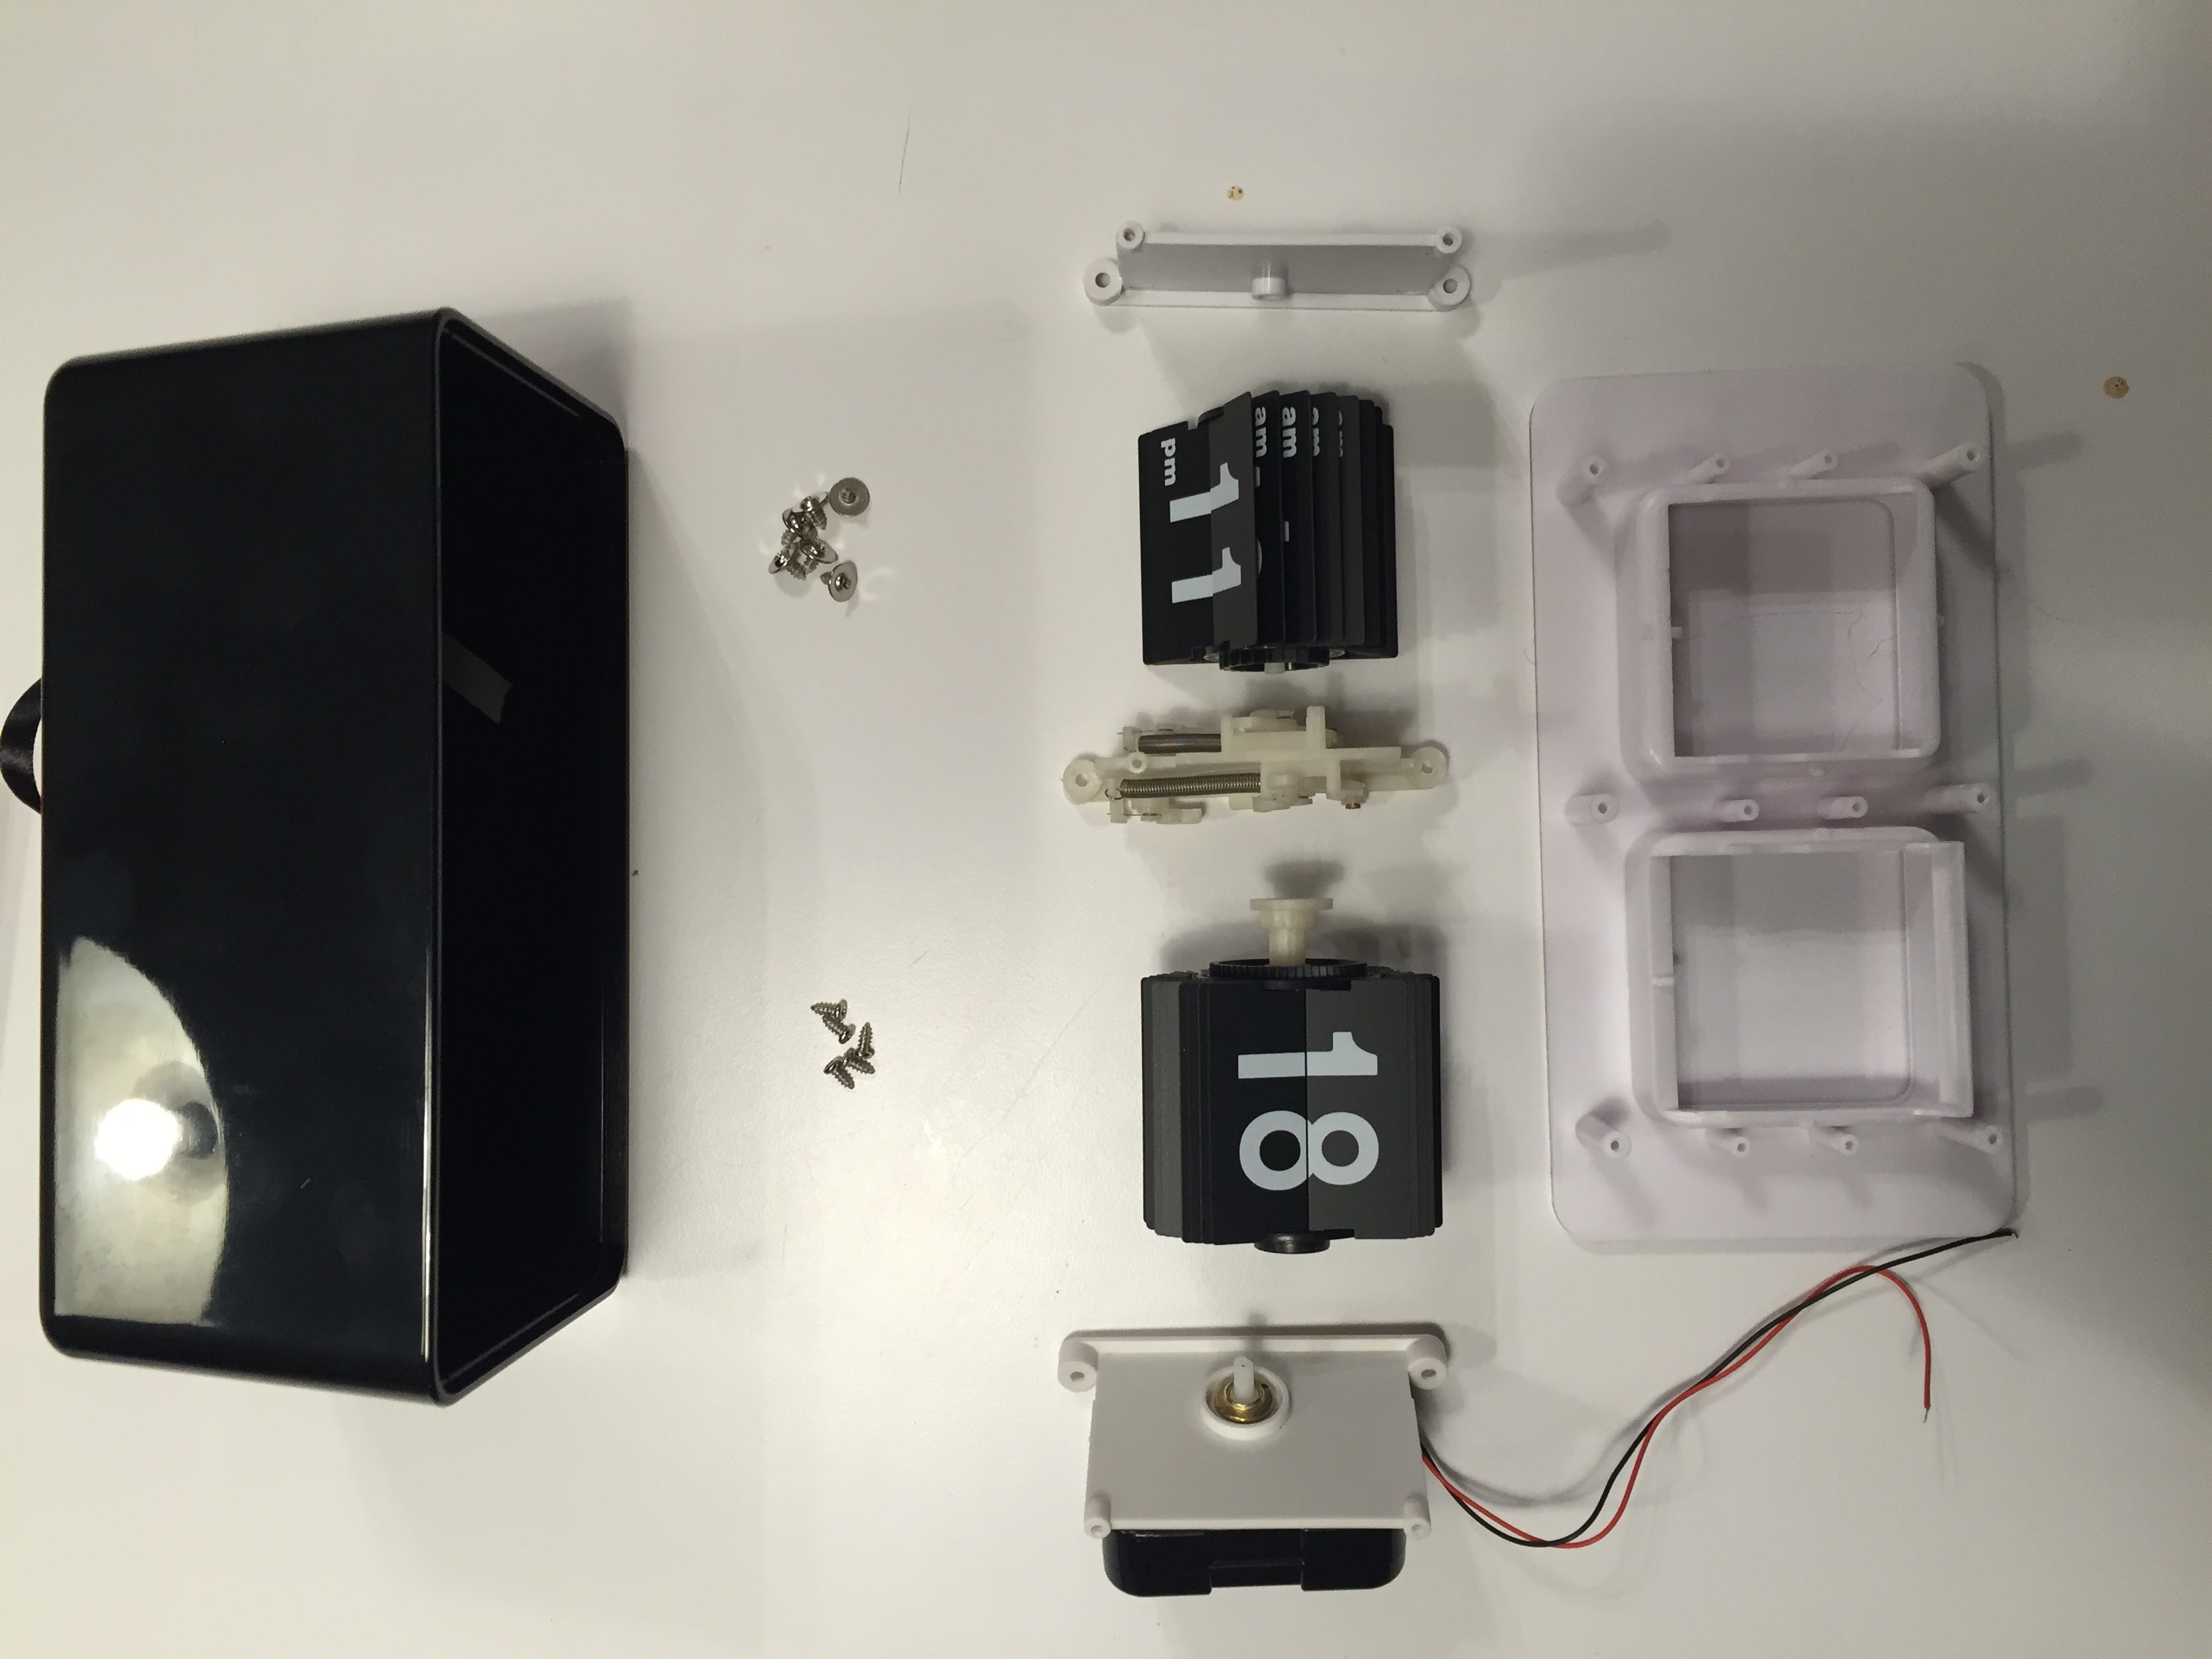
Split-Flip Display: Post 2, Research
Taredown! This is by far one of my favorite processes. In-fact I think it will ispire a new regular post - gabe breaks stuff. Also maybe another domain. But, to the taredown!

Split-Flip Display: Post 1, Inspiration
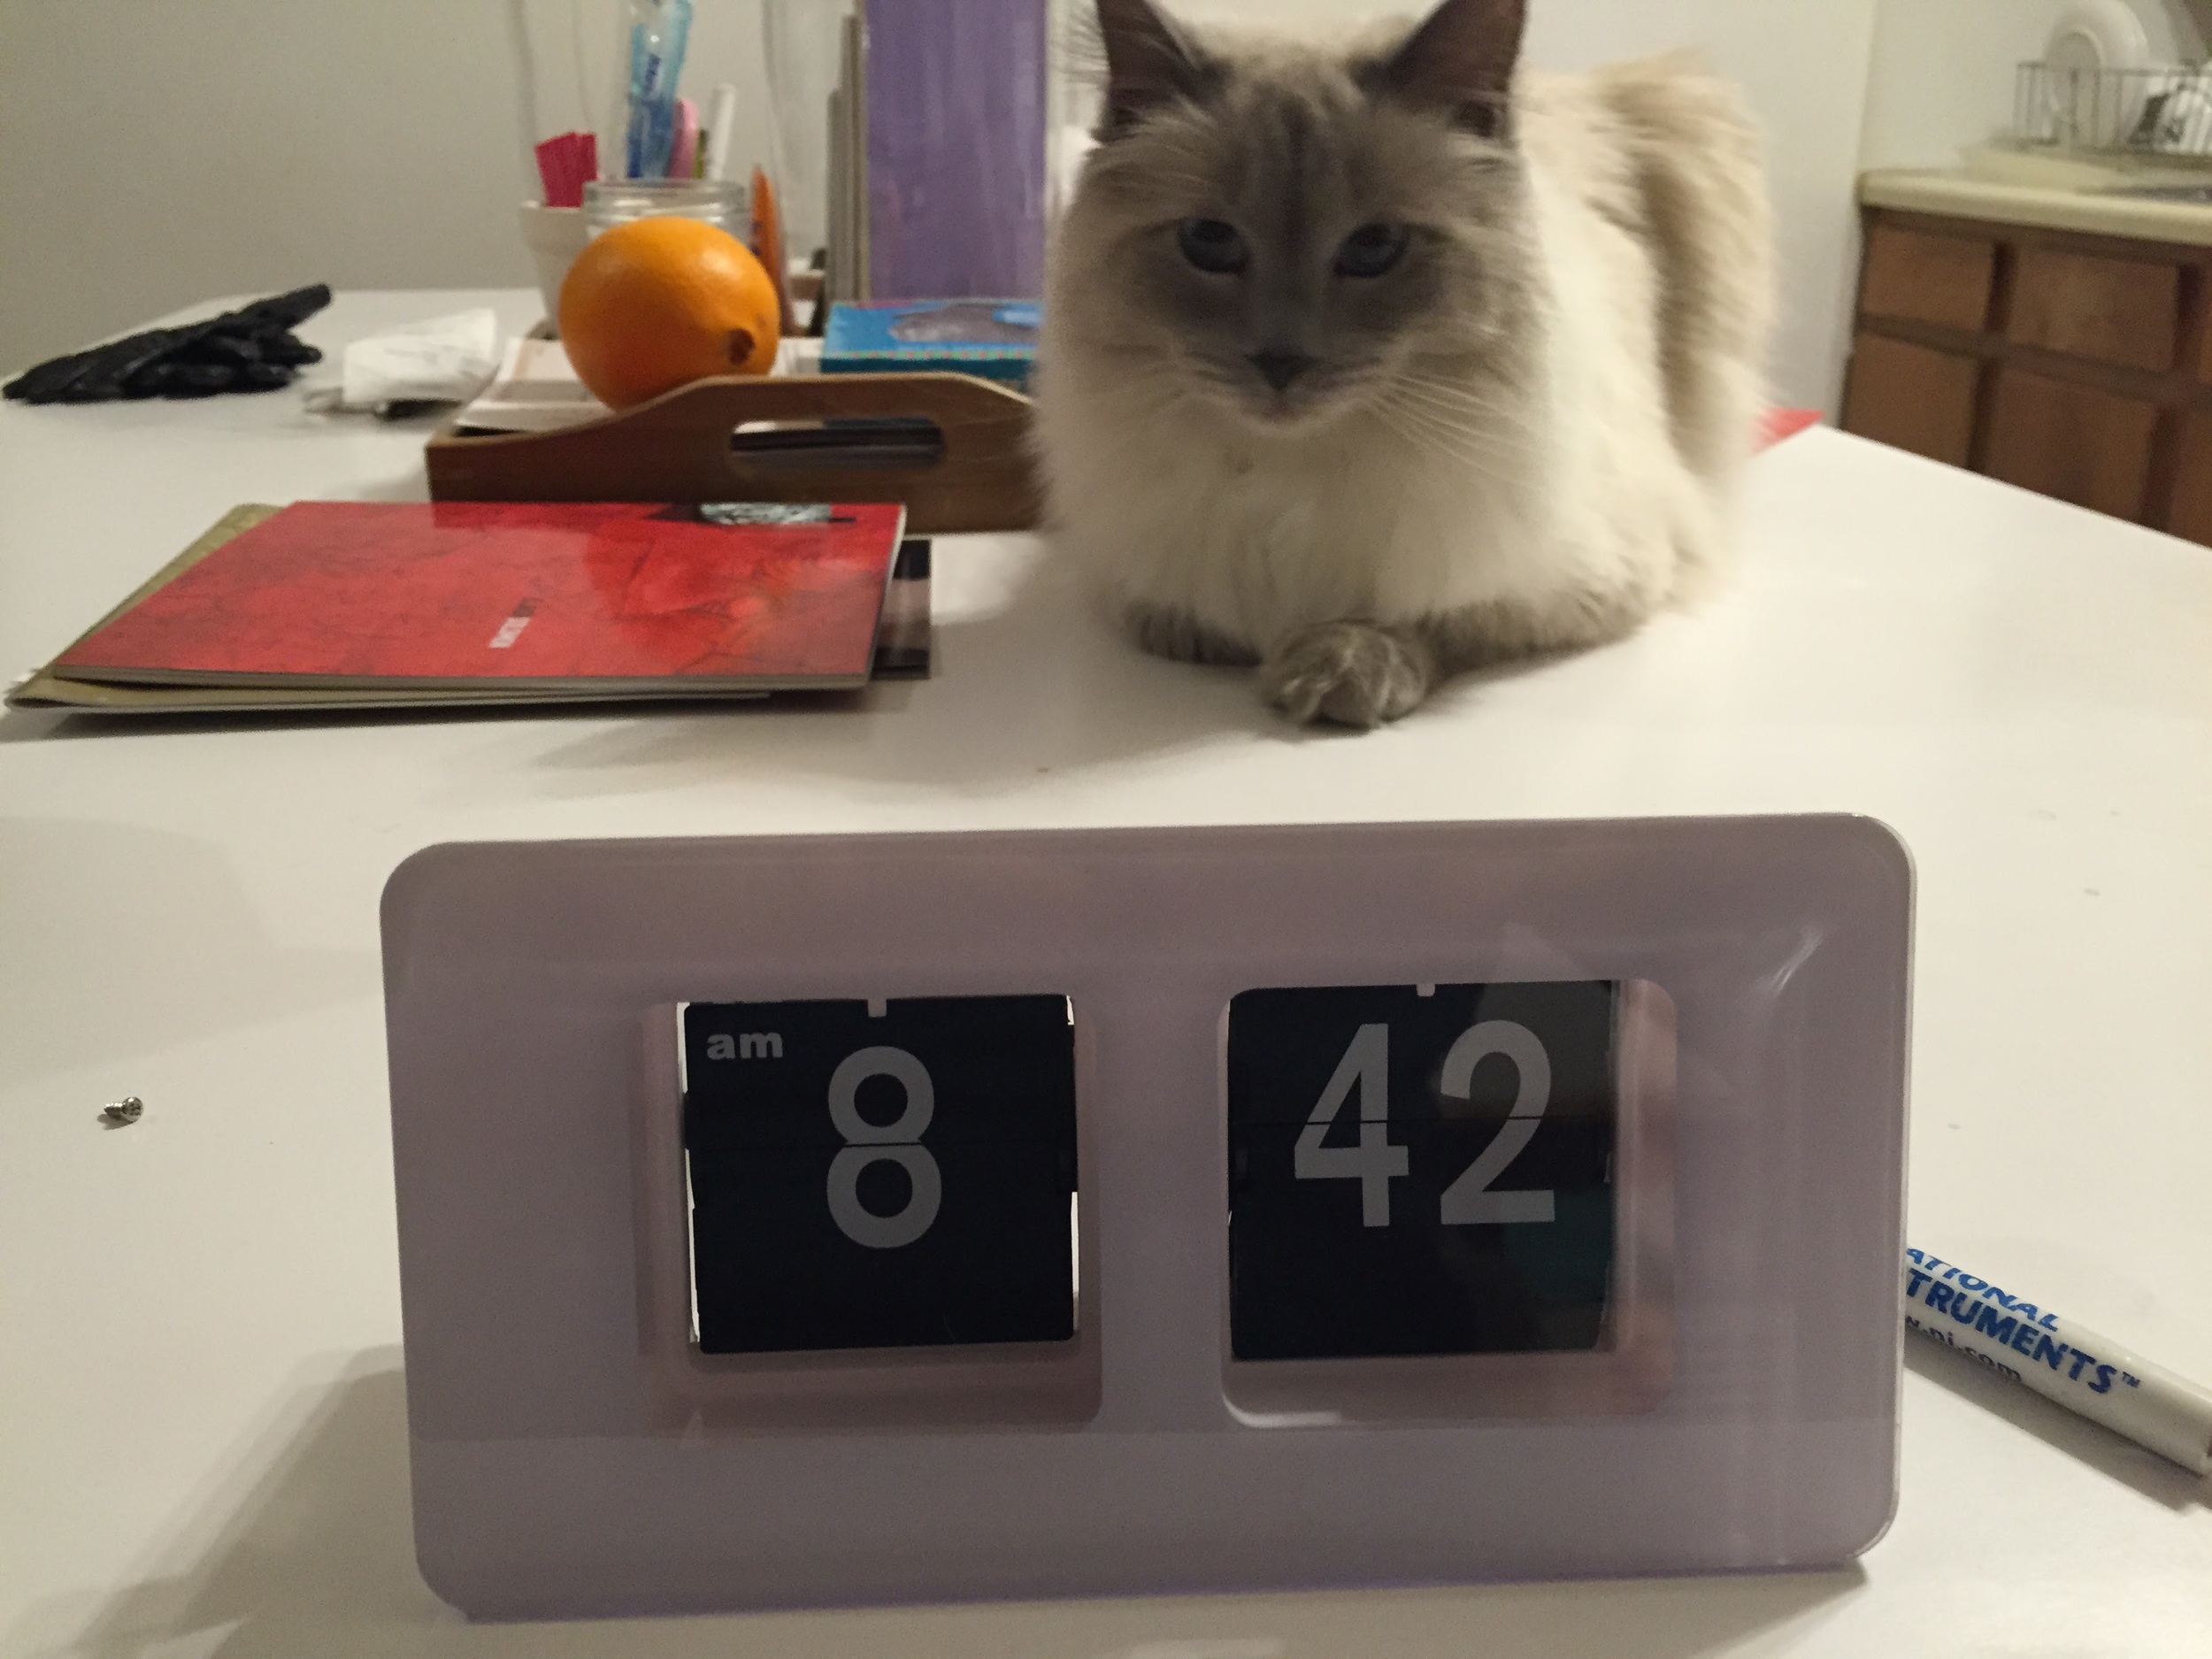
My projects normally start with coffee. or a walk. or both. In this case it also included a business trip to San Francisco during which I came across the split-flip display in the Ferry building. It took way to long to find the correct terminology for those types of signs, but hey, wikipedia is always your friend.
These things are awesome mechanically and I love the look of them. I want one for my desk to display notifications or a larger one on my wall to show me my calendar events for the day. A nice little integration project. Hook it into the open/close sensor on my bedroom door and time gate the update for the morning and the display waits until I'm awake to update.
First problem: split-flip displays are insanely expensive. The small clocks that use them are not but there are normally only 3 per clock as opposed to the matrix I am looking for.
Second problem: these displays are rarely "small". Even the the clocks ones when built into a messaging matrix would be very large.
Third problem: building the parts for these is tedious to to by hand or without injection molding parts / screen printing the pannels.
With those three problems this project now has 3 initatives:
- Low cost: Each module should be < $2.50 in materials. If I want a 140 character display that gives me a target total cost of $350 in materials.
- Able to sit on a desk or hung on the wall: Think medium picture framesize. I need the modules to be small enough to show a large amount of characters on a desk without taking up too much space or on a wall without being overbearing.
- Be built with RPTM: Because my run of these is very small larage manufacturing processes are out of the scope. Any designed files and parts need to be done so with the inention of being built on a machine build as a Rapid Prototyping Machine (RPTM).
And with those, the research and observation phase starts.
The Internet of Mindful Things: How we learned to stop worrying and love our connected devices.
It's taken a few years - as any new technology does - but connected devices are finally starting to come into their own. I don't mean there are more available or they are finally in the public consciousness. Rather that connected products have gotten to a mature enough point where we can do something with them.
Built from the foundations laid by hobby platforms such as X10 and Vera and commercial solutions akin to Control4 and Crestron, the new wave of home automation is not only easier to use but inherently more use case focused. Focused on making meaningful connections between products. Rather than a combination of products to which there are indeed finite but seemingly limitless and infinite ways to tie them together, we build towards individual connections that are easy to understand:
- Motion sensors that trigger lights
- Securing a house when no one is home
- Monitoring the health of a home to know when work is needed
- Changing the climate in our homes depending on our location inside of them
These are not new. Lutron has a light switch that will monitor motion and turn lights on when someone enters and off when the room is unoccupied. If our devices are truly connected they should talk to each other and react to our normal routine without continued input.
An article publish earlier today by Ben Kaufamn (Wink and Quirky CEO) sums up the inflection point we've gotten to:
Said more simply, we’ve all created products that are 50–100% more expensive than their unconnected alternative for the purpose of turing our phone into a universal remote control. And like most universal remote controls — these products are not the easiest to get setup and running.
Once again, we’ve fallen into the invention trap. New technology is great — but this particular use case has simply given the consumer more things they need to worry about.
Could this be the first wave of consumer product invention in history that doesn’t just give folks different things to worry about — but actually gives them less things to worry about?
It's a push and a plea for objects that are empowered and pull the technology into the background so we can continue interacting with the world around us free from interruption. It's one of the main reasons I love working on the projects everyone at Wink is pushing forward day in and day out.
There is more to all of this. More coming. Making passive connections is the first step towards making contextual computing a reality. Moving from a heads down personal technological landscape into one that is more reactive to the scenarios we move through in our daily lives. Oh so close to Jared Ficklin's Room-E.
We are building products which are mindful of the people and environment around them and react to it. The only way we will come to love our connected products is if they stop interrupting our lives and start adding to them.
Backpost 5: Being a Printer Master: Managing Mass Printing in a Makerspace
Title: Being a Printer Master: Managing Mass Printing in a Makerspace Date: 2013-04-25
Check out this awesome post by my friend Jeff Landrum about being a 3D printing master at the Georgia Tech Invention Studio and having to upkeep and deal with our 11 3D pringers spanning 8 different kinds. How do you deal with at least 50 different users a week all of whom have different understanding levels of the machines and want 100% up time? Click through and read! Great piece and some nice insight into each of the machines.
Backpost 4: Georgia Tech Invention Studio Sign
Title: Georgia Tech Invention Studio Sign Date: 2013-01-12
With the expansion of the Invention Studio at Georgia Tech, the shop was in need of a new sign and true to our maker culture a few other students and myself decided to build one!
It is made out of 1/8" aluminum with 3/4" round aluminum stand offs with all of the letters cut out on our Waterjet. It is lit by strips of RGB LEDs that are connected to a controller in the wall with an RF remote.
Backpost 3: The Phoenix Rises
Title: The Phoenix Rises Date: 2012-11-12
Backstory:
After designing and building a 3lb combat robot in 4 weeks for the Atlanta Mini Marker Fair (AMMF), I was coerced (read: accepted an invitation from Jamison) to go to GMX two weeks later for another competition. Now given that MowBot’s performance was good at the last competition but spotty with the weapon not working consistently, I felt the need to redesign and rebuild in the 2 weeks I had before the competition.
So here I go again. A complete redesign and rebuild in half the time as the original design and build. (Spoiler: I don’t get much sleep)
There were a couple of design flaws that I looked at from the first build:
Weapon Support Structure
There was way too much friction heating and a severe lack of constraints throughout the weapon drive system that caused a lot of vibration and slow ramp up speed. The weapon was virtually ineffective because of this.
Solution: Direct drive the the weapon off the motor. This calls for an increased support system using a thrust bearing, transfer shaft that bolts to the can of the motor, and a drive plate to attach the weapon.
Weapon
The weapon had a very weak torsional structure given that the main component was aluminum that bends fairly easily (check the pictures from after the competition at AMMF). The teeth were not near as hard as I thought they were and didn’t get the desired bite and destruction that was expected of it.
Solution: Weapon shape redesign, material hardening. I redesigned the shape of the weapon electing to make the entire thing out of S7 tool steel instead of the just the teeth. We did not realize this before but the S7 we had bought was just annealed and not hardened giving it a hardness of HRC20 instead of the ~HRC50 we were looking for.
Corners on the chassis
The corners where the armor met on the chassis got bent down in the rumble at AMMF by Dominant Mode and lifted the base up enough for my wheels to not contact the ground anymore making me unable to move.
Solution: reenforced corners. I left the angled armor on one of the sides and flattened the other so that the corner would be backed by the aluminum frame. I also switched to 1075 steel for the armor plating that was hardened and then tempered to turn it into spring steel.
Competition
After a late night drive up to Tennessee, some early morning assembly work, and just over 2 hours of sleep, the 6 of us who had come walked into GMX. The competition was a lot of fun with a good showing from all the robots. The new hardened armor got it’s test and held up remarkably well taking just scratches and not yielding. There was a large hit taken by one of the corners that bent all 4 aluminum rails of the chassis (redesign not successful). Luckily a hammer was able to correct the damage. The whole team be brought had trouble throughout the day with motor controllers failing, motors tearing themselves apart, and switches turning off in the middle of matches but the team helped with each repair, most of them being on robots that were not our own.
During the semi-final match I noticed some wires starting to stick out of the bottom of the chassis. The match ended in a win for MowBot but after I drop out of the area there was a small spark and fire started to come out of the bottom of my robot. After a quick use of the fire extinguisher, a trip outside, and a battery swap, MowBot was reborn as The Phenix clad with a new white finish from its ashy rebirth. It went on to loose the final and do well in the rumble taking hit after hit and earning a valiant second place at GMX.
All in all a great weekend and a lot of lessons learned. Always keep a fire extinguisher near by…
-Gabe
Backpost 2: The 4 Week Combat Robot Build Challenge: MowBo
Title: The 4 Week Combat Robot Build Challenge: MowBot Date: 2012-10-7
A little over a month ago it was mentioned in passing that there was going to be a combat robot arena at the Atlanta Mini Maker Faire the first weekend of October. The thought, “4 weeks is plenty of time” crossed my mind and it was off to start designing. I opted to build a 3lb robot; it gave me enough weight to build something with a decent weapon and not have to worry too much about weight. Below is what happened. MowBot is a 3lb combat robot with a solid 4 wheel tank drive, hardened 1095 steel plates for armor, and a spinning blade on top that has just over 800 joules of energy in it when fully spun up (this is the same amount of energy as dropping the 3lbs robot 60 meters and letting it hit the ground). He is the first combat bot I have built and it won its first competition! Click through to the read me post to see the whole build process or check out the portfolio page which has a gallery of all of the build pictures. Links to the videos of the competition are included!
Backpost 1: Building and Making: By Trial, Error, Elbow Grease, and Quick Learning
Title: Building and Making: By Trial, Error, Elbow Grease, and Quick Learning Date: 2012-09-17
This is The Building Experiment. A blog where I post articles, reactions, cool videos, resources for makers and hobbyists like myself, and all the cool projects (both complex and mundane) that I have and am working on.
Why The Building Experiment? I have always learned best by doing: by getting an idea, setting a goal, and then diving in and getting my hand dirty. If there is a question I have that I can't answer, I find someone or some article that can explain it to me. If I run into a problem I can't fix, I read, talk, listen, and tinker until I get an understanding and find a solution. The side effect? Quick learning that cements knowledge in a reality based foundation.
Have I burned out motors? Yes. Have I let the 'magic smoke' out of circuit boards? Absolutely. Have I understood the causes of the failures and come up with a solution to better the design? Every single time.
Through trial, error, a little bit of elbow grease, and a thirst for information and understanding, I am designing, making, and building to a better understanding of the world around me.
Happy building!
-Gabe